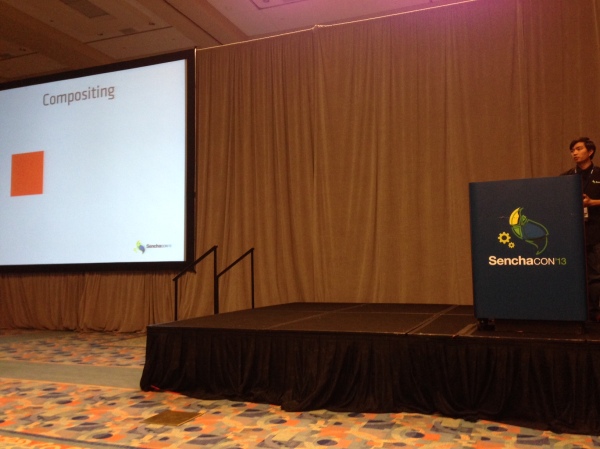
Sencha Con 2013 Wrapup

So another great Sencha Con is over, and I’m left to reflect on everything that went on over the last few days. This time was easily the biggest and best Sencha Con that I’ve been to, with 800 people in attendance and a very high bar set by the speakers. The organization was excellent, the location fun (even if the bars don’t open until 5pm…), and the enthusiasm palpable.

I’ve made a few posts over the last few days so won’t repeat the content here – if you want to see what else happened check these out too:

What I will do though is repeat my invitation to take a look at what we’re doing with JavaScript at C3 Energy. I wrote up a quick post about it yesterday and would love to hear from you – whether you’re at Sencha Con or not.

Now on to some general thoughts.

Content

There was a large range in the technical difficulty of the content, with perhaps a slightly stronger skew up the difficulty chain compared to previous events. This is a good thing, though there’s probably still room for more advanced content. Having been there before though, I know how hard it is to pitch that right so that everyone enjoys and gets value of out it.

The biggest challenge for me was the sheer number of tracks – at any one time there would be seven talks happening simultaneously, two or three of which I’d really want to watch. Personally I’d really love it if the hackathon was dropped in favor of a third day of sessions, with a shift down to 4-5 tracks. I’m sure there’s a cost implication to that, but it’s worth thinking about.

Videos

There were cameras set up in at least the main hall on the first day, but I didn’t see any on day 2. I did overhear that the video streams were being recorded directly from what was being shown on the projectors, with the audio recorded separately. If that’s true I’d guess it would make editing a bit easier so maybe that’ll means a quick release.

Naturally, take this with a pinch of salt until the official announcement comes out. In the meantime, there’s at least one video available so far:

Grgur lets off some steam

Grgur lets off some steam

Fun Things

The community pavilion was a great idea, and served as the perfect space for attendees with hang out away from the other rascals running around the hotel. Coffee and snacks were available whenever I needed them, and there was plenty of seating to chill out in.

I missed out on the visit to the theme park, which I hear was by far the most fun part of the event. Having a theme park kick out everyone but Sencha Con attendees while serving copious amounts of alcohol seemed to go down very well with the attendees!

Unconference

I had been hoping to give a presentation on the new C3UI framework at the unconference, but unfortunately there were no projectors available at that part of the event. My outrageous presentation style tends to require a projector and a stage to stomp around on so that was a no-go for me.

Maybe next time a lightning talk track alongside the unconference would be a good addition. So long as there is a projector 🙂

All in all, what a fantastic event. Can’t wait for next year.

Sencha Con 2013: Fastbook

I didn’t plan on writing a post purely on Fastbook, but Jacky’s presentation just now was so good I felt it needed one. If you haven’t seen Fastbook yet, it is Sencha’s answer to the (over reported) comments by Zuckerburg that using HTML5 for Facebook’s mobile app was a mistake.

Jacky on stage

After those comments there was a lot of debate around whether HTML5 is ready for the big time. Plenty of opinions were thrown around, but not all based on evidence. Jacky was curious about why Facebook’s old app was so slow, and wondered if he could use the same technologies to achieve a much better result. To say he was successful would be a spectacular understatement – Fastbook absolutely flies.

Performance can be hard to describe in words, so Sencha released this video that demonstrates the HTML5 Fastbook app against the new native Facebook apps. As you can see, not only is the HTML5 version at least as fast and fluid as the native versions, in several cases it’s actually significantly better (especially on Android).

Challenges

The biggest challenge here is dynamically loading and scrolling large quantities of data while presenting a 60fps experience to the user. 60fps means you have just 16.7ms per frame to do everything, which is a hugely tall order on a CPU and memory constrained mobile device.

The way to achieve this is to treat the page as an app rather than a traditional web page. This means we need to be a lot more proactive in managing how and when things are rendered – something that traditionally has been in the domain of the browser’s own rendering and layout engines. Thankfully, the framework will do all of this for you.

As an example, Jacky loaded up Gmail’s web app and showed what happens when you scroll a long way down your inbox. The more you scroll, the more divs are added to the document (one new div per message). Each div contains a bunch of child elements too, so we’re adding maybe a dozen or so nodes to our DOM tree per message.

The problem with this is that as the DOM tree gets larger and larger, everything slows down. You could see the inspector showing slower and slower layout recalculations, making the app sluggish.

The solution is to recycle DOM nodes once they’re no longer visible. In this way, a list that seems to have infinite content could contain only say 10 elements – just enough to fill the screen. Once you scroll down the list, DOM nodes that scrolled off the top are detached, updated with new data and placed at the bottom of the list. Simple. Ingenius. Beautiful.

Prioritization

There’s usually a lot more going on in an app than just animating a scrolling view though. There’s data to load via AJAX, images to load, compositing, processing, and whatever else your app needs to do. And then there are touch events, which need to feel perfectly responsive at all times, even while all of this is going on.

To make this sane and manageable, we have a new class called AnimationQueue. All of the jobs I just mentioned above – handling touch events, animation, network requests and so on – are dispatched through the AnimationQueue with a given priority. Touch event handling has the top priority, followed by animation, followed by everything else.

AnimationQueue does as much as it can in that 16.7ms window, then breaks execution again to allow the browser to reflow/repaint/whatever else it needs to do. What this means is that while scrolling down a large list, it’s likely that our CPU/GPU is being taxed so much that we don’t have any time to load images or other low priority jobs.

This is a Good Thing, because if we’re scrolling through a large list there’s a good chance we are going to skip right over those images anyway. In the end they’re loaded as soon as the AnimationQueue has some spare time, which is normally when your scrolling of the list has slowed down or stopped.

Sandboxing

The final, and most complex technique Jacky discussed was Sandboxing. The larger your application gets, the larger the DOM tree. Even if you are using best practices, there’s an expense to simply having so many components on the same page. The bottleneck here is in the browser itself – looks like we need another hack.

To get around this, we can dynamically create iframes that contain parts of our DOM tree. This way our main page DOM tree can remain small but we can still have a huge application. This not only speeds up browser repaint and reflow, it also improves compositing performance, DOM querying and more.

This all happens under the covers and Jacky’s aiming on including Ext.Sandbox in Sencha Touch 2.3 so that all apps can take advantage of this huge improvement. He cautioned (rightly) that it’ll only make 2.3 if it’s up to his high standards though, so watch this space.

Anatomy of a Sencha Touch 2 App

At its simplest, a Sencha Touch 2 application is just a small collection of text files – html, css and javascript. But applications often grow over time so to keep things organized and maintainable we have a set of simple conventions around how to structure and manage your application’s code.

A little while back we introduced a technology called Sencha Command. Command got a big overhaul for 2.0 and today it can generate all of the files your application needs for you. To get Sencha Command you’ll need to install the SDK Tools and then open up your terminal. To run the app generator you’ll need to make sure you’ve got a copy of the Sencha Touch 2 SDK, cd into it in your terminal and run the app generate command:

sencha generate app MyApp ../MyApp

This creates an application called MyApp with all of the files and folders you’ll need to get started generated for you. You end up with a folder structure that looks like this:

st2-dir-overview

This looks like a fair number of files and folders because I’ve expanded the app folder in the image above but really there are only 4 files and 3 folders at the top level. Let’s look at the files first:

  • index.html: simplest HTML file ever, just includes the app JS and CSS, plus a loading spinner
  • app.js: this is the heart of your app, sets up app name, dependencies and a launch function
  • app.json: used by the microloader to cache your app files in localStorage so it boots up faster
  • packager.json: configuration file used to package your app for native app stores

To begin with you’ll only really need to edit app.js – the others come in useful later on. Now let’s take a look at the folders:

  • app: contains all of your application’s source files – models, views, controllers etc
  • resources: contains the images and CSS used by your app, including the source SASS files
  • sdk: contains the important parts of the Touch SDK, including Sencha Command

The app folder

You’ll spend 90%+ of your time inside the app folder, so let’s drill down and take a look at what’s inside that. We’ve got 5 subfolders, all of which are empty except one – the view folder. This just contains a template view file that renders a tab panel when you first boot the app up. Let’s look at each:

Easy stuff. There’s a bunch of documentation on what each of those things are at the Touch 2 docs site, plus of course the Getting Started video with awesome narration by some British guy.

The resources folder

Moving on, let’s take a look at the resources folder:

st2-dir-resources

Five folders this time – in turn:

  • icons: the set of icons used when your app is added to the home screen. We create some nice default ones for you
  • loading: the loading/startup screen images to use when your app’s on a home screen or natively packaged
  • images: this is where you should put any app images that are not icons or loading images
  • sass: the source SASS files for your app. This is the place to alter the theming for your app, remove any CSS you’re not using and add your own styles
  • css: the compiled SASS files – these are the CSS files your app will use in production and are automatically minified for you

There are quite a few icon and loading images needed to cover all of the different sizes and resolutions of the devices that Sencha Touch 2 supports. We’ve included all of the different formats with the conventional file names as a guide – you can just replace the contents of resources/icons and resources/loading with your own images.

The sdk folder

Finally there’s the SDK directory, which contains the SDK’s source code and all of the dependencies used by Sencha Command. This includes Node.js, Phantom JS and others so it can start to add up. Of course, none of this goes into your production builds, which we keep as tiny and fast-loading as possible, but if you’re not going to use the SDK Tools (bad move, but your call!) you can remove the sdk/command directory to keep things leaner.

By vendoring all third-party dependencies like Node.js into your application directory we can be confident that there are no system-specific dependencies required, so you can zip up your app, send it to a friend and so long as she has the SDK Tools installed, everything should just work.

Hopefully that lays out the large-scale structure of what goes where and why – feel free to ask questions!

Building a data-driven image carousel with Sencha Touch 2

This evening I embarked on a little stellar voyage that I’d like to share with you all. Most people with great taste love astronomy and Sencha Touch 2, so why not combine them in a fun evening’s web app building?

NASA has been running a small site called APOD (Astronomy Picture Of the Day) for a long time now, as you can probably tell by the awesome web design of that page. Despite its 1998-era styling, this site incorporates some pretty stunning images of the universe and is begging for a mobile app interpretation.

We’re not going to go crazy, in fact this whole thing only took about an hour to create, but hopefully it’s a useful look at how to put something like this together. In this case, we’re just going to write a quick app that pulls down the last 20 pictures and shows them in a carousel with an optional title.

Here’s what it looks like live. You’ll need a webkit browser (Chrome or Safari) to see this, alternatively load up http://code.edspencer.net/apod on a phone or tablet device:

The full source code for the app is up on github, and we’ll go through it bit by bit below.

The App

Our app consists of 5 files:

index.html, which includes our JavaScript files and a little CSS
app.js, which boots our application up
app/model/Picture.js, which represents a single APOD picture
app/view/Picture.js, which shows a picture on the page
app/store/Pictures.js, which fetches the pictures from the APOD RSS feed

The whole thing is up on github and you can see a live demo at http://code.edspencer.net/apod. To see what it’s doing tap that link on your phone or tablet, and to really feel it add it to your homescreen to get rid of that browser chrome.

The Code

Most of the action happens in app.js, which for your enjoyment is more documentation than code. Here’s the gist of it:

This is pretty simple stuff and you can probably just follow the comments to see what’s going on. Basically though the app.js is responsible for launching our application, creating the Carousel and info Components, and setting up a couple of convenient event listeners.

We also had a few other files:

Picture Model

Found in app/model/Picture.js, our model is mostly just a list of fields sent back in the RSS feed. There is one that’s somewhat more complicated than the rest though – the ‘image’ field. Ideally, the RSS feed would have sent back the url of the image in a separate field and we could just pull it out like any other, but alas it is embedded inside the main content.

To get around this, we just specify a convert function that grabs the content field, finds the first image url inside of it and pulls it out. To make sure it looks good on any device we also pass it through Sencha IO src, which resizes the image to fit the screen size of whatever device we happen to be viewing it on:

Pictures Store

Our Store is even simpler than our Model. All it does is load the APOD RSS feed over JSON-P (via Google’s RSS Feed API) and decode the data with a very simple JSON Reader. This automatically pulls down the images and runs them through our Model’s convert function:

Tying it all together

Our app.js loads our Model and Store, plus a really simple Picture view that is basically just an Ext.Img. All it does then is render the Carousel and Info Component to the screen and tie up a couple of listeners.

In case you weren’t paying attention before, the info component is just an Ext.Component that we rendered up in app.js as a place to render the title of the image you’re currently looking at. When you swipe between items in the carousel the activeitemchange event is fired, which we listen to near the top of app.js. All our activeitemchange listener does is update the HTML of the info component to the title of the image we just swiped to.

But what about the info component itself? Well at the bottom of app.js we added a tap listener on Ext.Viewport that hides or shows the info Component whenever you tap anywhere on the screen (except if you tap on the Carousel indicator icons). With a little CSS transition loveliness we get a nice fade in/out transition when we tap the screen to reveal the image title. Here’s that tap listener again:

The End of the Beginning

This was a really simple app that shows how easy it is to put these things together with Sencha Touch 2. Like with most stories though there’s more to come so keep an eye out for parts 2 and 3 of this intergalactic adventure.

Like Android? Help us fix it

Near the end of last week’s Sencha Touch 2 beta release blog post there was an appeal to the community to help raise awareness of a nasty flashing issue with Android 4.x phones. Every time you tried to use an animation on a web page the browser would flash, wait a bit, then finally perform the animation.

We filed a ticket on this about a week ago and thanks to your help (over 300 of you starred the issue), got a prompt response from the Android team with a fix for the flashing issue.

Getting it Right

However, that’s only half the story. While the ugly flash is gone, animation performance on Android 4.x phones is still unacceptable. As it stands a 2 year old device running Android 2.x easily outruns the top of the range devices today running 4.x.

We really want to have excellent support for all Android devices. While 4.x accounts for only 1% of all Android phones today, that number is only going to go up. And when it does, we want to be ready to ship fast, fluid, beautiful apps onto it.

So we’ve created a new ticket with reduced, reproducible test cases and filed it to the bug tracker. We’ll continue to give the Android team as much support as we can in order to resolve this quickly, but once again we’ll need your help.

In fact all we need is a few seconds of your time. Just open the ticket and click the star at the top left. That’s all we need – it tells the Android team just how many people care about this issue and will help them prioritize it accordingly.

If you want to help out more, take a moment to add a comment to the ticket outlining your own experiences with this issue, like the m.lanyrd.com developer did. Highlighting specific cases where you’ve had problems will really help.

Thanks!

Helping raise awareness of this issue will help everyone who uses or develops for Android devices on the web, and enables technologies like Sencha Touch to deliver slick, immersive apps without resorting to rewriting your app for each platform. We appreciate your help!

Star the issue now

Sencha Touch 2 Hits Beta

Earlier today we released Sencha Touch 2 Beta 1 – check out the official sencha.com blog post and release notes to find out all of the awesome stuff packed into this release.

This is a really important release for us – Sencha Touch 2 is another huge leap forward for the mobile web and hitting beta is a massive milestone for everyone involved with the project. From a personal standpoint, working on this release with the amazing Touch team has been immensely gratifying and I hope the end result more than meets your expectations of what the mobile web can do.

While you should check out the official blog post and release notes to find out the large scale changes, there are a number of things I’d really like to highlight today.

A Note on Builds

Before we get into the meat of B1 itself, first a quick note that we’ve updated the set of builds that we generate with the release. Previously there had been some confusion around which build you should be using in which circumstances so we’ve tried to simplify that.

Most people, most of the time should be using the new sencha-touch-debug.js while developing their app as it is unminified code that contains all of the debug warnings and comments. If you’re migrating from 1.x, use the new builds/sencha-touch-all-compat.js build as it provides an easier migration path by logging additional warnings when you use 1.x-style class configurations.

Because we provide 5 builds in total we created a guide on the shipped builds and JSBuilder (the tool that creates a custom build specifically for your app). The guide contains a table showing all of the options enabled for each build – hopefully that makes it easy to choose which build is best for your needs.

Performance

In case you haven’t seen Sencha Touch 2 yet the first thing you need to know is that it’s fast. Crazy fast. Check out this side by side comparison between 1.x and 2.x:

Layout performance is enormously faster in 2.x due to a brand new layout engine that operates much closer to the browser’s optimized CSS layout engine. The difference is pretty startling, especially on Android devices, which had sometimes struggled with Sencha Touch 1. Performance remains a top priority for us and we’re really pleased with the improvements that we’ve secured with 2.0.

Navigation View

The new Navigation View is one of the slickest, sexiest things we’ve created for 2.0. I could play with this thing all day. If you’ve got a phone in your pocket or a tablet near by open up the Navigation View example and see it for yourself. If you’re not, check out this beautiful video of it in action:


Navigation Views are really easy to put together and make your application immediately come to life. Check out the Navigation View docs to see how easy it is to add this to your own applications.

Awesome new examples

As of beta 1 we have 24 examples shipped with the SDK, including no fewer than 6 MVC examples – Kitchen Sink, Jogs with Friends, Twitter, Kiva, Navigation View and GeoCongress.

The Kitchen Sink and Twitter examples also take advantage of Device Profiles, which are a powerful way to customize your app to render customized UI for tablets and phones. Take a look at the Kitchen Sink on your phone and on an iPad to see how it rearranges itself depending on the screen size.

Finally, if you’re seeing Sencha Touch 2 for the first time you may not have seen the new inline examples in the documentation center. This is a brand new thing for Sencha Touch and allows you to edit code live on the documentation page and immediately see the results – give it a go on the Carousel docs.

Ludicrous Amounts of Documentation

Speaking of docs, we have a stunning amount of learning material for Sencha Touch 2. We’ve been through all of the major classes, making sure that the functions are clearly documented and that each one has some great intro text that describes what the class does and how it fits in with the rest of the framework.

We’ve also created over 20 brand new guides for Sencha Touch 2, covering everything from getting started through to developing using MVC, using Components and creating custom builds for your applications. We’ve put a huge amount of effort into our docs for Sencha Touch 2 and I really hope it pays off for you guys and makes it easier than ever to create great mobile web apps.

Go Build Something

It’s only beta 1 but we’re very happy with the performance, stability, API and documentation of Sencha Touch 2. I think it’s the best thing we’ve ever created, and really highlights what the mobile web is capable of. 2012 looks set to be a very exciting year for Sencha Touch so I hope you’ll join us on the adventure and build something amazing with it.

Download Sencha Touch 2 Beta 1 Now

The Class System in Sencha Touch 2 – What you need to know

Sencha Touch 1 used the class system from Ext JS 3, which provides a simple but powerful inheritance system that makes it easier to write big complex things like applications and frameworks.

With Sencha Touch 2 we’ve taken Ext JS 4’s much more advanced class system and used it to create a leaner, cleaner and more beautiful framework. This post takes you through what has changed and how to use it to improve your apps.

Syntax

The first thing you’ll notice when comparing code from 1.x and 2.x is that the class syntax is different. Back in 1.x we would define a class like this:

MyApp.CustomPanel = Ext.extend(Ext.Panel, {
    html: 'Some html'
});

This would create a subclass of Ext.Panel called MyApp.CustomPanel, setting the html configuration to ‘Some html’. Any time we create a new instance of our subclass (by calling new MyApp.CustomPanel()), we’ll now get a slightly customized Ext.Panel instance.

Now let’s see how the same class is defined in Sencha Touch 2:

Ext.define('MyApp.CustomPanel', {
    extend: 'Ext.Panel',
    
    config: {
        html: 'Some html'
    }
});

There are a few changes here, let’s go through them one by one. Firstly and most obviously we’ve swapped out Ext.extend for Ext.define. Ext.define operates using strings – notice that both ‘MyApp.CustomPanel’ and ‘Ext.Panel’ are now wrapped in quotes. This enables one of the most powerful parts of the new class system – dynamic loading.

I actually talked about this in a post about Ext JS 4 last year so if you’re not familiar you should check out the post, but in a nutshell Sencha Touch 2 will automatically ensure that the class you’re extending (Ext.Panel) is loaded on the page, fetching it from your server if necessary. This makes development easier and enables you to create custom builds that only contain the class your app actually uses.

The second notable change is that we’re using a ‘config’ block now. Configs are a special thing in Sencha Touch 2 – they are properties of a class that can be retrieved and updated at any time, and provide extremely useful hook functions that enable you to run any custom logic you like whenever one of them is changed.

Whenever you want to customize any of the configurations of a subclass in Sencha Touch 2, just place them in the config block and the framework takes care of the rest, as we’ll see in a moment.

Consistency

The biggest improvement that comes from the config system is consistency. Let’s take our MyApp.CustomPanel class above and create an instance of it:

var myPanel = Ext.create('MyApp.CustomPanel');

Every configuration has an automatically generated getter and setter function, which we can use like this:

myPanel.setHtml('New HTML');
myPanel.getHtml(); //returns 'New HTML'

This might not seem much, but the convention applies to every single configuration in the entire framework. This eliminates the guesswork from the API – if you know the config name, you know how to get it and update it. Contrast this with Sencha Touch 1 where retrieving the html config meant finding some property on the instance, and updating it meant calling myPanel.update(‘New HTML’), which is nowhere near as predictable.

Instantiating

You probably noticed that we used a new function above – Ext.create. This is very similar to just calling ‘new MyApp.CustomPanel()’, with the exception that Ext.create uses the dynamic loading system to automatically load the class you are trying to instantiate if it is not already on the page. This can make life much easier when developing your app as you don’t have to immediately manage dependencies – it just works.

In the example above we just instantiated a default MyApp.CustomPanel but of course we can customize it at instantiation time by passing configs into Ext.create:

var myPanel = Ext.create('MyApp.CustomPanel', {
    html: 'Some Custom HTML'
});

We can still call getHtml() and setHtml() to retrieve and update our html config at any time.

Subclassing and Custom Configs

We created a simple subclass above that provided a new default value for Ext.Panel’s html config. However, we can also add our own configs to our subclasses:

Ext.define('MyApp.CustomPanel', {
    extend: 'Ext.Panel',
    
    config: {
        html: 'Some html',
        anotherConfig: 'default value'
    }
});

The ‘anotherConfig’ configuration doesn’t exist on Ext.Panel so it’s defined for the first time on MyApp.CustomPanel. This automatically creates our getter and setter functions for us:

var myPanel = Ext.create('MyApp.CustomPanel');
myPanel.setAnotherConfig('Something else');
myPanel.getAnotherConfig(); //now returns 'Something else'

Notice how the getter and setter names were automatically capitalized to use camelCase like all of the other functions in the framework. This was done automatically, but Sencha Touch 2 does another couple of very nice things for you – it creates hook functions:

Ext.define('MyApp.CustomPanel', {
    extend: 'Ext.Panel',
    
    config: {
        html: 'Some html',
        anotherConfig: 'default value'
    },
    
    applyAnotherConfig: function(value) {
        return "[TEST] " + value;
    },
    
    updateAnotherConfig: function(value, oldValue) {
        this.setHtml("HTML is now " + value);
    }
});

We’ve added two new functions to our class – applyAnotherConfig and updateAnotherConfig – these are both called when we call setAnotherConfig. The first one that is called is applyAnotherConfig. This is passed the value of the configuration (‘default value’ by default in this case) and is given the opportunity to modify it. In this case we’re prepending “[TEST] ” to whatever anotherConfig is set to:

var myPanel = Ext.create('MyApp.CustomPanel');
myPanel.setAnotherConfig('Something else');
myPanel.getAnotherConfig(); //now returns '[TEST] Something else'

The second function, updateAnotherConfig, is called after applyAnotherConfig has had a chance to modify the value and is usually used to effect some other change – whether it’s updating the DOM, sending an AJAX request, or setting another config as we do here.

When we run the code above, as well as ‘[TEST] ‘ being prepended to our anotherConfig configuration, we’re calling this.setHtml to update the html configuration too. There’s no limit to what you can do inside these hook functions, just remember the rule – the apply functions are used to transform new values before they are saved, the update functions are used to perform the actual side-effects of changing the value (e.g. updating the DOM or configuring other classes).

How we use it

The example above is a little contrived to show the point – let’s look at a real example from Sencha Touch 2’s Ext.Panel class:

applyBodyPadding: function(bodyPadding) {
    if (bodyPadding === true) {
        bodyPadding = 5;
    }

    bodyPadding = Ext.dom.Element.unitizeBox(bodyPadding);

    return bodyPadding;
},

updateBodyPadding: function(newBodyPadding) {
    this.element.setStyle('padding', newBodyPadding);
}

Here we see the apply and update functions for the bodyPadding config. Notice that in the applyBodyPadding function we set a default and use the framework’s unitizeBox function to parse CSS padding strings (like ‘5px 5px 10px 15px’) into top, left, bottom and right paddings, which we then return as the transformed value.

The updateBodyPadding then takes this modified value and performs the actual updates – in this case setting the padding style on the Panel’s element based on the new configuration. You can see similar usage in almost any component class in the framework.

Find out more

This is just a look through the most important aspects of the new class system and how they impact you when writing apps in Sencha Touch 2. To find out more about the class system we recommend taking a look at the Class System guide and if you have any questions the forums are a great place to start.

Sencha Touch 2 – Thoughts from the Trenches

As you may have seen, we put out the first public preview release of Sencha Touch 2 today. It only went live a few hours ago but the feedback has been inspiring so far. For the full scoop see the post on the sencha.com blog. A few thoughts on where we are with the product:

Performance

Performance on Android devices in particular is breathtaking. I never thought I’d see the day where I could pick up an Android 2.3 device and have it feel faster than an iPhone 4, and yet that’s exactly what Sencha Touch 2 brings to the table. I recorded this short video on an actual device to show real world performance:

Now try the same on Sencha Touch 1.x (or any other competing framework) and (if you’re anything like me) cringe at what we were accustomed to using before. That video’s cool, but the one that’s really driving people wild is the side by side comparison of the layout engines in 1.x and 2.x.

Getting our hands on a high speed camera and recording these devices at 120fps was a lot of fun. Slowing time down to 1/4 of normal speed shows just how much faster the new layout engine is than what we used to have:

The most amazing part here is that we actually finish laying out *before* the phone’s rotation animation has completed. Skipping through the video frame by frame there are at least 5 frames where the app is fully laid out and interactive while the phone’s rotation animation is still running. Beating the phone’s own rotation speed is the holy grail – it’s not possible to make it any faster.

Documentation

I’ll admit it, I’m fanatical about great documentation. I’m sure I drive everyone else on the team crazy but I think it’s worth it. This is only a preview release but it already contains by far the best, most complete documentation we’ve ever shipped in an initial release.

In fact, the team’s worked so hard on documenting classes that it’s probably better than the (already good) Ext JS 4 docs. Naturally, this makes it time to further improve the Ext JS documentation.

We’ve added some awesome features here – lots of videos, 11 brand new guides and illustrations. My favourite new feature is definitely the inline examples with live previews though – seeing Sencha Touch running live in a phone/tablet right there in the docs is just amazing. Little gems like the live twitter feed in the bottom-most example in the DataView docs really sell just how easy it is to configure these components.

We set a high bar for this though. We’ve gone from woeful documentation in 1.x to good documentation in 2.x, but what we’re shooting for is excellence. We’ll continue to round out our content over coming weeks, and have a few new features rolling out soon that will raise the bar once again.

Onwards

We have a few features left to implement, which is why we’re calling this preview and not beta. Probably the biggest thing now is getting routing/deep linking back into the framework, along with a nice new syntax that I think you’ll find really easy to use. We’re also missing carousel animations and a handful of other things that will be going back in over the coming weeks. We have Sencha Con 2011 in just 12 days now though so we’ll share more details there.

Finally though, I want to thank everyone who participated in the closed preview phase, and for everyone sending their support and kind words on the blog, the forums and on twitter. We really appreciate all the great feedback and I hope we can exceed your expectations with a fast, polished, gorgeous 2.0 final!

%d bloggers like this: