Recently, I've been exploring the potential of React Server Components to enhance JavaScript applications. In particular, topics like Error handling and retry with React Server Components and Promises across the void: Streaming data with RSC delve into the intricacies of handling asynchronous data, providing developers with methods to create robust and efficient apps. These articles aim to demystify how to better manage errors and payloads in web development, making modern frameworks more practical for everyday use.
Moreover, I've been working on incorporating AI into Node.js, showcased in ReadNext: AI Content Recommendations for Node JS. This open-source project helps integrate AI-driven content recommendations, showing the synergy between JavaScript and emerging technologies like artificial intelligence. By implementing such tools, I hope to drive the development of smarter, more intuitive applications that leverage the best of current tech stacks.
ReadNext: AI Content Recommendations for Node JS
Recently I posted about AI Content Recommendations with TypeScript, which concluded by introducing a new NPM package I've been working on called ReadNext. This post is dedicated to ReadNext, and will go into more detail about how to use ReadNext in Node JS, React, and other JavaScript projects.
What it is
ReadNext is a Node JS package that uses AI to generate content recommendations. It's designed to be easy to use, and can be integrated into any Node JS project with just a few lines of code. It is built on top of LangChain, and delegates to an LLM of your choice for summarizing your content to generate recommendations. It runs locally, does not require you to deploy anything, and has broad support for a variety of content types and LLM providers.
ReadNext is not an AI itself, nor does it want your money, your data or your soul. It's just a library that makes it easy to find related content for developers who use JavaScript as their daily driver. It's best used at build time, and can be integrated into your CI/CD pipeline to generate recommendations for your content as part of your build process.
How to use it
Get started in the normal way:
Configure a ReadNext instance:
Index your content:
Error handling and retry with React Server Components
React Server Components are a game-changer when it comes to building large web applications without sending megabytes of JavaScript to the client. They allow you to render components on the server and stream them to the client, which can significantly improve the performance of your application.
However, React Server Components can throw errors, just like regular React components. In this article, we'll explore how to handle and recover from errors in React Server Components.
Error boundaries
In React, you can use error boundaries to catch errors that occur during rendering, in lifecycle methods, or in constructors of the whole tree below them. An error boundary is a React component that catches JavaScript errors anywhere in its child component tree and logs those errors, displaying a fallback UI instead of crashing the entire application.
To create an error boundary in React, you need to define a component that implements the componentDidCatch lifecycle method. This method is called whenever an error occurs in the component tree below the error boundary.
Promises across the void: Streaming data with RSC
Last week we looked at how React Server Component Payloads work under the covers. Towards the end of that article I mentioned a fascinating thing that you can do with RSC: sending unresolved promises from the server to the client. When I first read that I thought it was a documentation bug, but it's actually quite real (though with some limitations).
Here's a simple example of sending a promise from the server to the client. First, here's our server-rendered component, called SuspensePage in this case:
So we just imported a getData() function that returns a promise that resolves after 1 second. This simulates a call to a database or other asynchronous action. Here's our fake getData() function:
Decoding React Server Component Payloads
If you've spent any time playing with React Server Components, you've probably noticed a bunch of stuff like this at the bottom of your web pages:
You may be wondering what this all means. It's not super well documented, and all pretty bleeding-edge. It's not likely to be something you need to worry about in your day-to-day work, but if you're a curious geek like me, read on.
What you're looking at is a bunch of <script> tags automatically injected into the end of the page. The content above is a copy-paste from just about the most basic Next JS application imaginable. It consists of 2 components - a layout.tsx and a page.tsx:
Distributed Tracing with Node JS
The microservice architecture pattern solves many of the problems inherent with monolithic applications. But microservices also bring challenges of their own, one of which is figuring out what went wrong when something breaks. There are at least 3 related challenges here:
- Log collection
- Metric collection
- Distributed tracing
Log and metric collection is fairly straightforward (we'll cover these in a separate post), but only gets you so far.
Let's say your 20 microservice application starts behaving badly - you start getting timeouts on a particular API and want to find out why. The first place you look may be your centralized metrics service. This will likely confirm to you that you have a problem, as hopefully you have one or more metrics that are now showing out-of-band numbers.
But what if the issue only affects part of your user population, or worse, a single (but important) customer? In these cases your metrics - assuming you have the right ones in the first place - probably won't tell you much.
A New Stack for 2016: Getting Started with React, ES6 and Webpack
A lot has changed in the last few years when it comes to implementing applications using JavaScript. Node JS has revolutionized how many of us create backend apps, React has become a widely-used standard for creating the frontend, and ES6 has come along and completely transformed JavaScript itself, largely for the better.
All of this brings new capabilities and opportunities, but also new challenges when it comes to figuring out what's worth paying attention to, and how to learn it. Today we'll look at how to set up my personal take on a sensible stack in this new world, starting from scratch and building it up as we go. We'll focus on getting to the point where everything is set up and ready for you to create the app.
The stack we'll be setting up today is as follows:
- React - to power the frontend
- Babel - allows us to use ES6 syntax in our app
- Webpack - builds our application files and dependencies into a single build
Although we won't be setting up a Node JS server in this article, we'll use npm to put everything else in place, so adding a Node JS server using Express or any other backend framework is trivial. We're also going to omit setting up a testing infrastructure in this post - this will be the subject of the next article.
Jasmine and Jenkins Continuous Integration
I use Jasmine as my JavaScript unit/behavior testing framework of choice because it's elegant and has a good community ecosystem around it. I recently wrote up how to get Jasmine-based autotesting set up with Guard, which is great for development time testing, but what about continuous integration?
Well, it turns out that it's pretty difficult to get Jasmine integrated with Jenkins. This is not because of an inherent problem with either of those two, it's just that no-one got around to writing an open source integration layer until now.
The main problem is that Jasmine tests usually expect to run in a browser, but Jenkins needs results to be exposed in .xml files. Clearly we need some bridge here to take the headless browser output and dump it into correctly formatted .xml files. Specifically, these xml files need to follow the JUnit XML file format for Jenkins to be able to process them. Enter guard-jasmine.
guard-jasmine
In my previous article on getting Jasmine and Guard set up, I was using the jasmine-headless-webkit and guard-jasmine-headless-webkit gems to provide the glue. Since then I've replaced those 2 gems with a single gem - guard-jasmine, written by Michael Kessler, the Guard master himself. This simplifies our dependencies a little, but doesn't buy us the .xml file functionality we need.
Sencha Con 2013: Ext JS Performance tips
Just as with Jacky's session, I didn't plan on making a separate post about this, but again the content was so good and I ended up taking so many notes that it also warrants its own space. To save myself from early carpal tunnel syndrome I'm going to leave this one in more of a bullet point format.
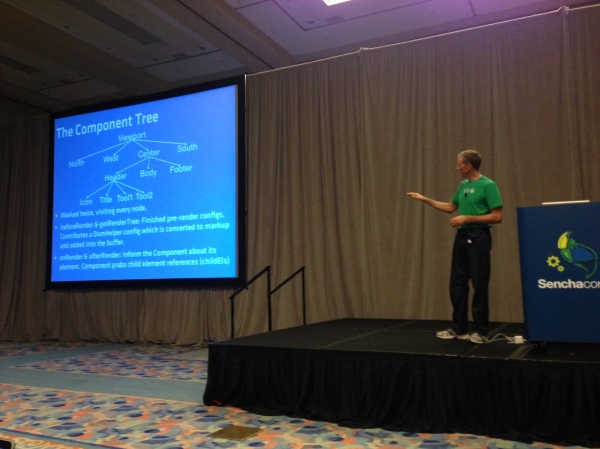
Ext JS has been getting more flexible with each release. You can do many more things with it these days than you used to be able to, but there has been a performance cost associated with that. In many cases this performance degradation is down to the way the framework is being used, as opposed to a fundamental problem with the framework itself.
There's a whole bunch of things that you can do to dramatically speed up the performance of an app you're not happy with, and Nige "Animal" White took us through them this morning. Here's what I was able to write down in time:
Slow things
Nige identified three of the top causes of sluggish apps, which we'll go through one by one:
- Network latency
- JS execution
- Layout activity
Autotesting JavaScript with Jasmine and Guard
One of the things I really loved about Rails in the early days was that it introduced me to the concept of autotest - a script that would watch your file system for changes and then automatically execute your unit tests as soon as you change any file.
Because the unit test suite typically executes quickly, you'd tend to have your test results back within a second or two of hitting save, allowing you to remain in the editor the entire time and only break out the browser for deeper debugging - usually the command line output and OS notifications (growl at the time) would be enough to set you straight.
This was a fantastic way to work, and I wanted to get there again with JavaScript. Turns out it's pretty easy to do this. Because I've used a lot of ruby I'm most comfortable using its ecosystem to achieve this, and as it happens there's a great way to do this already.
Enter Guard
Guard is a simple ruby gem that scans your file system for changes and runs the code of your choice whenever a file you care about is saved. It has a great ecosystem around it which makes automating filesystem-based triggers both simple and powerful. Let's start by making sure we have all the gems we need:
Anatomy of a Sencha Touch 2 App
At its simplest, a Sencha Touch 2 application is just a small collection of text files - html, css and javascript. But applications often grow over time so to keep things organized and maintainable we have a set of simple conventions around how to structure and manage your application's code.
A little while back we introduced a technology called Sencha Command. Command got a big overhaul for 2.0 and today it can generate all of the files your application needs for you. To get Sencha Command you'll need to install the SDK Tools and then open up your terminal. To run the app generator you'll need to make sure you've got a copy of the Sencha Touch 2 SDK, cd into it in your terminal and run the app generate command:
This creates an application called MyApp with all of the files and folders you'll need to get started generated for you. You end up with a folder structure that looks like this:
Building a data-driven image carousel with Sencha Touch 2
This evening I embarked on a little stellar voyage that I'd like to share with you all. Most people with great taste love astronomy and Sencha Touch 2, so why not combine them in a fun evening's web app building?
NASA has been running a small site called APOD (Astronomy Picture Of the Day) for a long time now, as you can probably tell by the awesome web design of that page. Despite its 1998-era styling, this site incorporates some pretty stunning images of the universe and is begging for a mobile app interpretation.
We're not going to go crazy, in fact this whole thing only took about an hour to create, but hopefully it's a useful look at how to put something like this together. In this case, we're just going to write a quick app that pulls down the last 20 pictures and shows them in a carousel with an optional title.
Here's what it looks like live. You'll need a webkit browser (Chrome or Safari) to see this, alternatively load up http://code.edspencer.net/apod on a phone or tablet device:
Like Android? Help us fix it
Near the end of last week's Sencha Touch 2 beta release blog post there was an appeal to the community to help raise awareness of a nasty flashing issue with Android 4.x phones. Every time you tried to use an animation on a web page the browser would flash, wait a bit, then finally perform the animation.
We filed a ticket on this about a week ago and thanks to your help (over 300 of you starred the issue), got a prompt response from the Android team with a fix for the flashing issue.
Getting it Right
However, that's only half the story. While the ugly flash is gone, animation performance on Android 4.x phones is still unacceptable. As it stands a 2 year old device running Android 2.x easily outruns the top of the range devices today running 4.x.
We really want to have excellent support for all Android devices. While 4.x accounts for only 1% of all Android phones today, that number is only going to go up. And when it does, we want to be ready to ship fast, fluid, beautiful apps onto it.
So we've created a new ticket with reduced, reproducible test cases and filed it to the bug tracker. We'll continue to give the Android team as much support as we can in order to resolve this quickly, but once again we'll need your help.
Sencha Touch 2 Hits Beta
Earlier today we released Sencha Touch 2 Beta 1 - check out the official sencha.com blog post and release notes to find out all of the awesome stuff packed into this release.
This is a really important release for us - Sencha Touch 2 is another huge leap forward for the mobile web and hitting beta is a massive milestone for everyone involved with the project. From a personal standpoint, working on this release with the amazing Touch team has been immensely gratifying and I hope the end result more than meets your expectations of what the mobile web can do.
While you should check out the official blog post and release notes to find out the large scale changes, there are a number of things I'd really like to highlight today.
A Note on Builds
Before we get into the meat of B1 itself, first a quick note that we've updated the set of builds that we generate with the release. Previously there had been some confusion around which build you should be using in which circumstances so we've tried to simplify that.
The Class System in Sencha Touch 2 - What you need to know
Sencha Touch 1 used the class system from Ext JS 3, which provides a simple but powerful inheritance system that makes it easier to write big complex things like applications and frameworks.
With Sencha Touch 2 we've taken Ext JS 4's much more advanced class system and used it to create a leaner, cleaner and more beautiful framework. This post takes you through what has changed and how to use it to improve your apps.
Syntax
The first thing you'll notice when comparing code from 1.x and 2.x is that the class syntax is different. Back in 1.x we would define a class like this:
This would create a subclass of Ext.Panel called MyApp.CustomPanel, setting the html configuration to 'Some html'. Any time we create a new instance of our subclass (by calling new MyApp.CustomPanel()), we'll now get a slightly customized Ext.Panel instance.
Proxies in Ext JS 4
One of the classes that has a lot more prominence in Ext JS 4 is the data Proxy. Proxies are responsible for all of the loading and saving of data in an Ext JS 4 or Sencha Touch application. Whenever you're creating, updating, deleting or loading any type of data in your app, you're almost certainly doing it via an Ext.data.Proxy.
If you've seen January's Sencha newsletter you may have read an article called Anatomy of a Model, which introduces the most commonly-used Proxies. All a Proxy really needs is four functions - create, read, update and destroy. For an AjaxProxy, each of these will result in an Ajax request being made. For a LocalStorageProxy, the functions will create, read, update or delete records from HTML5 localStorage.
Because Proxies all implement the same interface they're completely interchangeable, so you can swap out your data source - at design time or run time - without changing any other code. Although the local Proxies like LocalStorageProxy and MemoryProxy are self-contained, the remote Proxies like AjaxProxy and ScriptTagProxy make use of Readers and Writers to encode and decode their data when communicating with the server.
Ext JS 4: The Class Definition Pipeline
Last time, we looked at some of the features of the new class system in Ext JS 4, and explored some of the code that makes it work. Today we're going to dig a little deeper and look at the class definition pipeline - the framework responsible for creating every class in Ext JS 4.
As I mentioned last time, every class in Ext JS 4 is an instance of Ext.Class. When an Ext.Class is constructed, it hands itself off to a pipeline populated by small, focused processors, each of which handles one part of the class definition process. We ship a number of these processors out of the box - there are processors for handling mixins, setting up configuration functions and handling class extension.
The pipeline is probably best explained with a picture. Think of your class starting its definition journey at the bottom left, working its way up the preprocessors on the left hand side and then down the postprocessors on the right, until finally it reaches the end, where it signals its readiness to a callback function:
Classes in Ext JS 4: Under the hood
Last week we unveiled a the brand new class system coming in Ext JS 4. If you haven’t seen the new system in action I hope you’ll take a look at the blog post on sencha.com and check out the live demo. Today we’re going to dig a little deeper into the class system to see how it actually works.
To briefly recap, the new class system enables us to define classes like this:
Here we’ve set up a slightly simplified version of the Ext.Window class. We’ve set Window up to be a subclass of Panel, declared that it requires the Ext.Tool class and that it mixes in functionality from the Ext.util.Draggable class.
There are a few new things here so we’ll attack them one at a time. The ‘extend’ declaration does what you’d expect - we’re just saying that Window should be a subclass of Panel. The ‘requires’ declaration means that the named classes (just Ext.Tool in this case) have to be present before the Window class can be considered ‘ready’ for use (more on class readiness in a moment).
Sencha Touch tech talk at Pivotal Labs
I recently gave an introduction to Sencha Touch talk up at Pivotal Labs in San Francisco. The guys at Pivotal were kind enough to record this short talk and share it with the world - it's under 30 minutes and serves as a nice, short introduction to Sencha Touch:
UPDATE: Pivotal got acquired, this link broke. The world moved on.
The slides are available on slideshare and include the code snippets I presented. The Dribbble example used in the talk is very similar to the Kiva example that ships with the Sencha Touch SDK, so I recommend checking that out if you want to dive in further.
Using the Ext JS PivotGrid
One of the new components we just unveiled for the Ext JS 3.3 beta is PivotGrid. PivotGrid is a powerful new component that reduces and aggregates large datasets into a more understandable form.
A classic example of PivotGrid's usefulness is in analyzing sales data. Companies often keep a database containing all the sales they have made and want to glean some insight into how well they are performing. PivotGrid gives the ability to rapidly summarize this large and unwieldy dataset - for example showing sales count broken down by city and salesperson.
A simple example
We created an example of this scenario in the 3.3 beta release. Here we have a fictional dataset containing 300 rows of sales data (see the raw data). We asked PivotGrid to break the data down by Salesperson and Product, showing us how they performed over time. Each cell contains the sum of sales made by the given salesperson/product combination in the given city and year.
Let's see how we create this PivotGrid:
Offline Apps with HTML5: A case study in Solitaire
One of my contributions to the newly-launched Sencha Touch mobile framework is the Touch Solitaire game. This is not the first time I have ventured into the dizzying excitement of Solitaire game development; you may remember the wonderful Ext JS Solitaire from 18 months ago. I'm sure you'll agree that the new version is a small improvement.
Solitaire is a nice example of a fun application that can be written with Sencha Touch. It makes use of the provided Draggables and Droppables, CSS-based animations, the layout manager and the brand new data package. The great thing about a game like this though is that it can be run entirely offline. Obviously this is simple with a native application, but what about a web app? Our goal is not just having the game able to run offline, but to save your game state locally too.
The answer comes in two parts:
Web Storage and the Sencha data package
HTML5 provides a brand new API called Web Storage for storing data locally. You can read all about it on my Web Storage post on Sencha's blog but the summary is that you can store string data locally in the browser and retrieve it later, even if the browser or the user's computer had been restarted in the meantime.
Jaml updates
Jaml seems to have been getting a lot of interest lately. Here are a few quick updates on what's been going on:
- Tom Robinson added support for CommonJS
- Eneko Alonso ported the project to MooTools, creating mooml
- Carl Furrow wrote up a nice comparison on Jaml and EJS
- Jaml is now a rendering option in JavaScriptMVC, along with John Resig's microtemplates
- Andrew Dupont committed a series of patches such as improving Jaml's efficiency and optionally removing the 'with' and 'eval' magic
In addition Jaml was recently picked up by Ajaxian, and a couple of people have written up blog posts about Jaml in languages other than English, which is great to see.
Jaml is up on Github and has a number of forks already. If you like the library and have something to add, fork away and send me a pull request!
If you've never seen Jaml before or have forgotten what it does, it turns this:
OSX Screensaver emulation with Canvas: That's Bean
OS X has a pretty little screensaver which takes a bunch of images and 'drops' them, spinning, onto the screen. Think of it like scattering photographs onto a table, one at a time.
Naturally, there's a desperate need for a JavaScript/Canvas port of this functionality, resulting in the following:
I had to limit the video capture framerate a bit so the video makes it look less smooth than it actually is. Check it out running in your own browser here.
For obvious reasons I have called the code behind this Bean, and it's all available up on Github.
For the curious, here's a little explanation about how it works. Bean starts off with a blank canvas and a list of image urls, which it preloads before getting started. It then drops one image at a time, rotating it as it goes. Each falling image is called a Plunger, because it plunges.
Each Plunger gets a random position and rotation to end up in, and takes care of drawing itself to the canvas on each frame by calculating its current size and rotation as it falls away from you.
Jaml: beautiful HTML generation for JavaScript
Generating HTML with JavaScript has always been ugly. Hella ugly. It usually involves writing streams of hard-to-maintain code which just concatenates a bunch of strings together and spits them out in an ugly mess.
Wouldn't it be awesome if we could do something pretty like this:
And have it output something beautiful like this:
With Jaml, we can do exactly that. Jaml is a simple library inspired by the excellent Haml library for Ruby. It works by first defining a template using an intuitive set of tag functions, and then rendering it to appear as pretty HTML. Here's an example of how we'd do that with the template above:
Making RowEditor use your column renderers
The RowEditor plugin is one of my favourite Ext JS components. It basically allows any row on a grid to be turned into an adhoc form on the fly, saving you the effort of defining additional form components.
Recently I had a grid which had a few fields that don't have an editor, something like this:
Simple stuff - we just show a username and a signup date, which is altered by a renderer. When we double-click a row it turns into an editable row, and we get a textfield allowing us to edit the username. Unfortunately, while in edit mode our date renderer is ignored, and the raw value displayed instead.
Writing Better JavaScript - split up long methods
For the second time this week I'm going to pick on the usually delightful Ext JS library. Last time we discussed the overzealous use of the Module pattern; this time it's the turn of bloated methods.
As before, I'm not really picking on Ext at all - this happens all over the place. But again, this is the library closest to my heart and the one I know the best.
The Problem
We're going to take a look at Ext.data.XmlReader's readRecords method. Before we get started though, I'll repeat that this is intended as an example of an approach, not a whine at Ext in particular.
JavaScript Module pattern - overused, dangerous and bloody annoying
The Module Pattern is a way of using a closure in JavaScript to create private variables and functions. Here's a brief recap:
Breaking this down, we create a function which is executed immediately (via the brackets at the end) and returns an object which gets assigned to myObject.
ExtJS modules and mixins
A few days back Praveen Ray posted about "Traits" in Ext JS. What he described is pretty much what we'd call Modules in the Ruby world, and how to mix those modules into a given class.
Basically, using modules we can abstract common code into reusable chunks, and then include them into one or more classes later. This has several advantages - avoiding code repetition, decoupling code concepts and ease of unit testing among them.
While the idea is good, there is a better way of achieving this than Praveen suggests. Let's say we define the following modules, which are just plain old objects:
JavaScript FizzBuzz in a tweet
The FizzBuzz challenge has been around a while but I stumbled across it again after reading another unique Giles Bowkett post.
If you're not familiar with FizzBuzz, it's a little 'challenge' designed to test a candidate programmer's ability to perform a simple task. In this case, you just have to print out the numbers from 1 to 100, unless the number is a multiple of 3, when you should instead print "Fizz", 5 in which case you print "Buzz", or both 3 and 5 in which case you print "FizzBuzz".
Here's a trivial JavaScript implementation:
Pretty simple stuff, but a bit verbose. I wanted something that would fit into a tweet. It turns out that's pretty simple - this is 133 characters including whitespace, 7 within tolerance for a twitter message:
The trouble with new
We have a simple JavaScript class:
We create a new User:
All is well. Unless we forgot the 'new':
Curses! That's not what we want at all. By omitting the 'new' keyword, the JavaScript engine executes our 'User' constructor in the current scope, which in this case is the global window object. With the scope ('this') set to window, setting 'this.name' is now the same as setting 'window.name', which is not what we're trying to do.
Read my BDD article in this month's JS Magazine
I have an article on Behaviour Driven Development for JavaScript in June's edition of the excellent JavaScript Magazine.
If you haven't seen or read the magazine before (it's quite new), it's well worth the few dollars charged. The magazine format allows for in-depth articles that require more space, time and effort to write than a typical blog post, and which therefore often go unwritten.
The thrust of my article is that too much of our JavaScript goes untested, but that nowadays it's easy to fix that. I go through an example of a client side shopping cart, using the JSpec BDD library. Even if you don't buy/read the magazine, I highly recommend checking out JSpec and other libraries like it. As JavaScript powered applications become the norm, BDD will only become more important in ensuring our applications work properly, so now is a good time to start.
Also in this month's issue is a guide to using the Canvas tag, tips on how to use build scripts to optimise your JavaScript for each environment, AJAX security pointers and a roundup of community news.
'function' in JavaScript - operator vs statement
In JavaScript we have at least 4 ways of defining functions:
These are not all the same, and the crucial thing here is the word 'function' as used in each case. In the first example we're using the function statement, and in the second and third examples we're using the function operator. We'll come back to the fourth example later.
So what's the difference between the function statement and the function operator? Well first we need to understand a bit about anonymous functions. Most of us are familiar with using anonymous functions as event listeners - something like this:
Why you should be using History in your ExtJS applications
I've been making a few updates to the ExtJS API documents application recently. The actual updates include remembering which tabs you have open and using Ext.History to go between tabs (you can follow the forum post or see a beta version).
That's not quite ready yet, but what has been made very clear to me is that any ExtJS application with more than one view should be using Ext.History. With History we get urls inside the application itself, we can parse them and dispatch accordingly. For example, I'm using a Rails-like Router, which lets you define an internal url map like this:
The router knows how to decode urls based on the regular expression-like syntax above, and parse the matches into an object - for example:
Custom containers with ExtJS
ExtJS has several built-in Container classes - classes which can contain one or more other Ext.Components (such as Grids, Forms, other Panels, etc). The most obvious example of a Container is the Ext.Panel class, along with its subclasses such as Ext.TabPanel, Ext.form.FormPanel and Ext.Window. With each container class you can add a bunch of components, like this:
Which will just create a Panel with three other Panels as its child components ('panel' is the default xtype, so we don't have to specify it). More to the point, you can add and remove components from the Container like this:
JavaScript bra size calculator
One of the more mesmerizing websites I've worked on recently was for a lingerie boutique in the UK. Aside from the unenviable task of having to look at pictures of women in lingerie all day, I was also forced (forced!) to write a bra size calculator.
The theory behind bra size calculation is arcane and somewhat magical. Understanding of it does not come easily to man nor beast, so it is lucky that I, falling cleanly into neither category, have passed through pain and torment to save you the trouble.
Pleasing, no? The code looks like this, and can be found here:
Useful Rails javascript expansions for EXTJS
If you're using Edge Rails (or > 2.1, which isn't out at time of writing), and are using the EXT JS framework anywhere, here are a couple of handy javascript include tag expansions to clean up your views. Just chuck them into any file in your config/initializers directory:
The top one includes the relevant EXT base files and the second one includes all the Grid Filters from the excellent Filter Grid plugin (see http://ccinct.com/lab/filter-grid/.
Getting EXT PagingToolbars to save state
A problem that has recently had me pulling my hair out is how to save state in an EXT PagingToolbar.
Ext makes it easy to save the state of most of its components - by default it does this by setting a cookie with the relevant configuration info, then just reading it back when you load the component again. I've been using it to save the state of a few EXT grids I've been using on a recent project, this saves config such as which columns you have visible, which column you're sorting by, and how the columns are ordered.
That works great, and is trivial to implement - just set your provider (see http://extjs.com/deploy/dev/docs/?class=Ext.state.CookieProvider) and be sure to give your grid an id in its config - this is used as the key in the state provider and needs to be unique for each component.
The problem comes when you're using a paging toolbar though, as this does not save state, so every time you view the grid you're back to page 1. You can add state behaviour to the paginator by piggybacking the grid's state store, here's how it's done:
Rails asset tag expansions
If you're using edge rails you may have noticed that you can now define your own JavaScript expansions (if you're not on edge this will be included in the imminent 2.1 release). The default expansion that comes with rails looks like this:
Which grabs application.js as well as the prototype/scriptaculous javascripts and includes them all (only do that if you need it all - it adds ~150kb to your page). But say you've got a line which looks like this:
And say you want to include the same set of files on a different page - it turns out Rails makes it really easy to DRY this up. Make a new file in the config/initializers directory (I call my asset_tag_expansions.rb) and add a line like the following (don't forget to restart your server afterwards):