herdctl: an orchestration layer for Claude Code
herdctl is an orchestration layer for Claude Code. It lets your agents run on a schedule, as part of a fleet, and puts them right in your discord or slack channel.
I recently upgraded to 2.5 gigabit managed switches for my home network. That's mostly been a straightforward process - I was swapping a TP-Link TL-SG2016P for a TP-Link SG3218XP-M2: both switches have 16 ports (8 ports POE+), but the SG3218XP-M2 swaps out the 1 gigabit ports for 2.5 gigabit ports, and adds 2x 10 gigabit SFP ports for fiber connections.
As I have a disturbingly large home network, I bought 3 of these switches so that I could plug everything into a 2.5g port and use the 10g ports for interconnects between the switches themselves. Each switch is in a different cupboard/closet in the house, with one of them being in the home theater closet and another in the bedroom closet. If they're noisy, they're annoying.
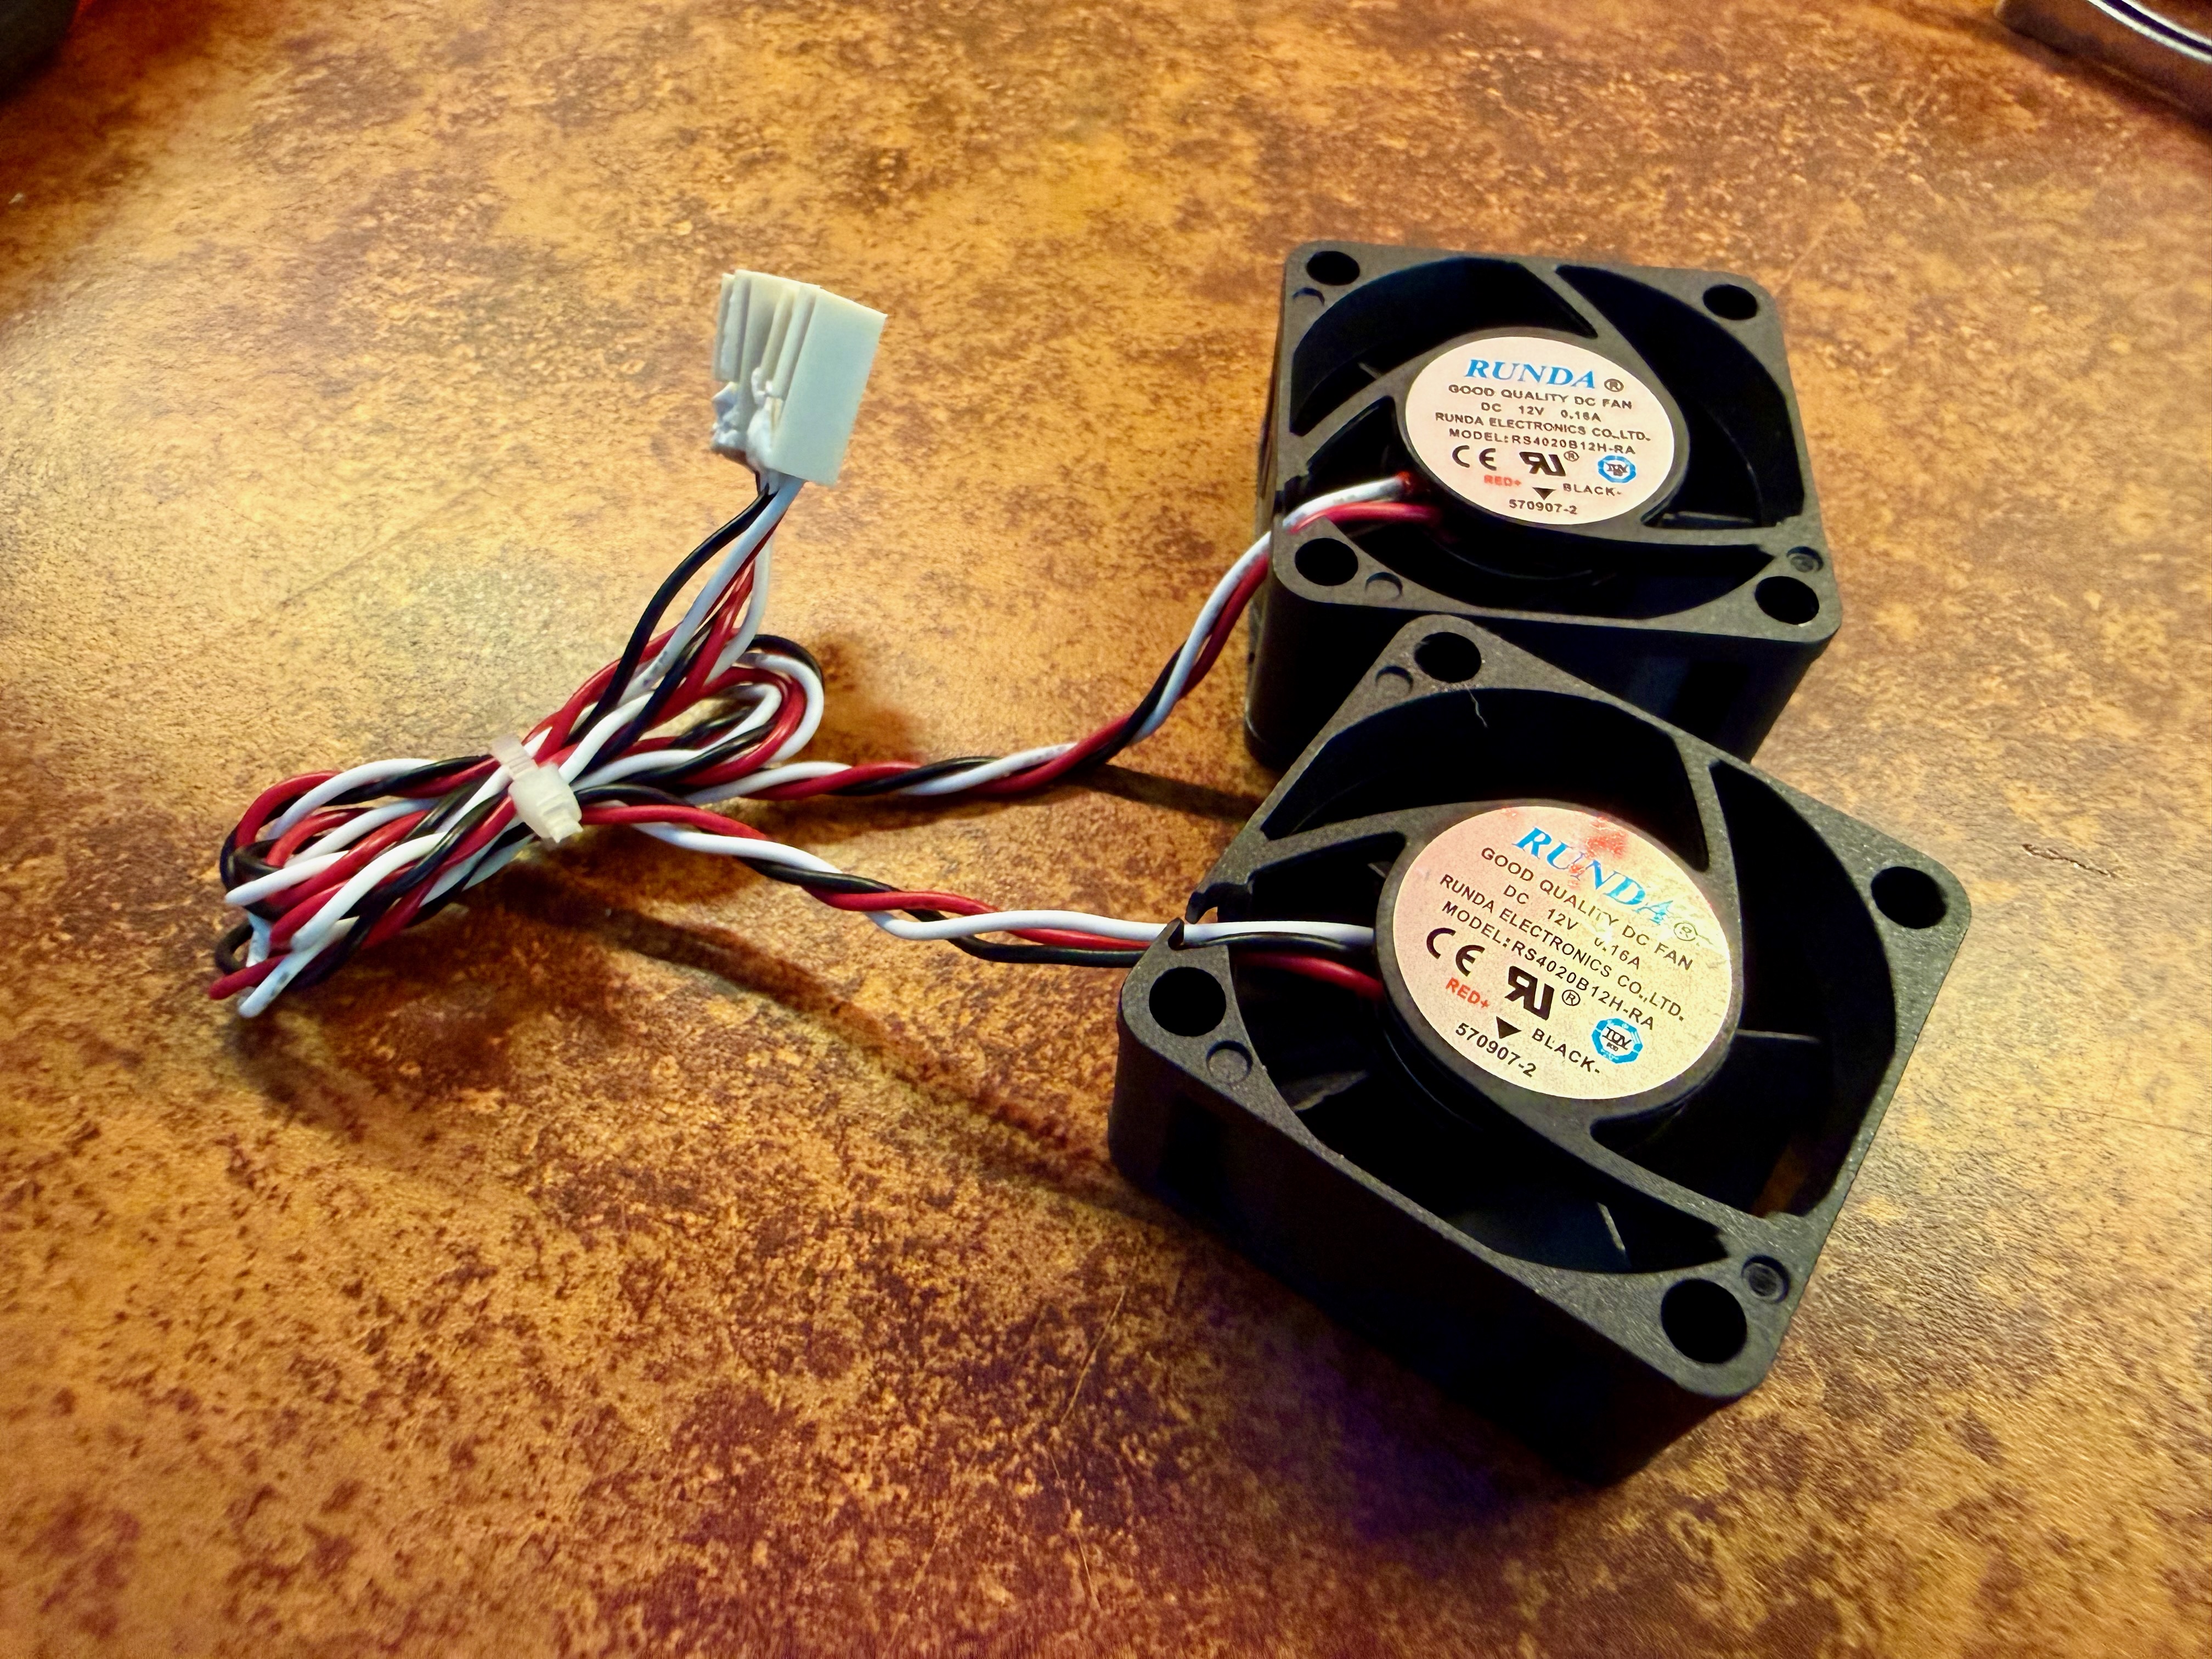
And noisy they are. It's my first time owning switches that make noise that can be heard from more than a few feet away. The noise all comes from a couple of tiny 40mm fans. When the switch powers up, they run at full throttle, which I measured at about 50db. After a minute or so it calms down to about 40db, but that's still actually quite annoying, and far louder than anything else in the rack
Thankfully it's pretty easy to solve this. Noctua make these lovely silent 40mm fans that are perfect for the job. They're a straight swap and the process is straightforward. I used these tools:
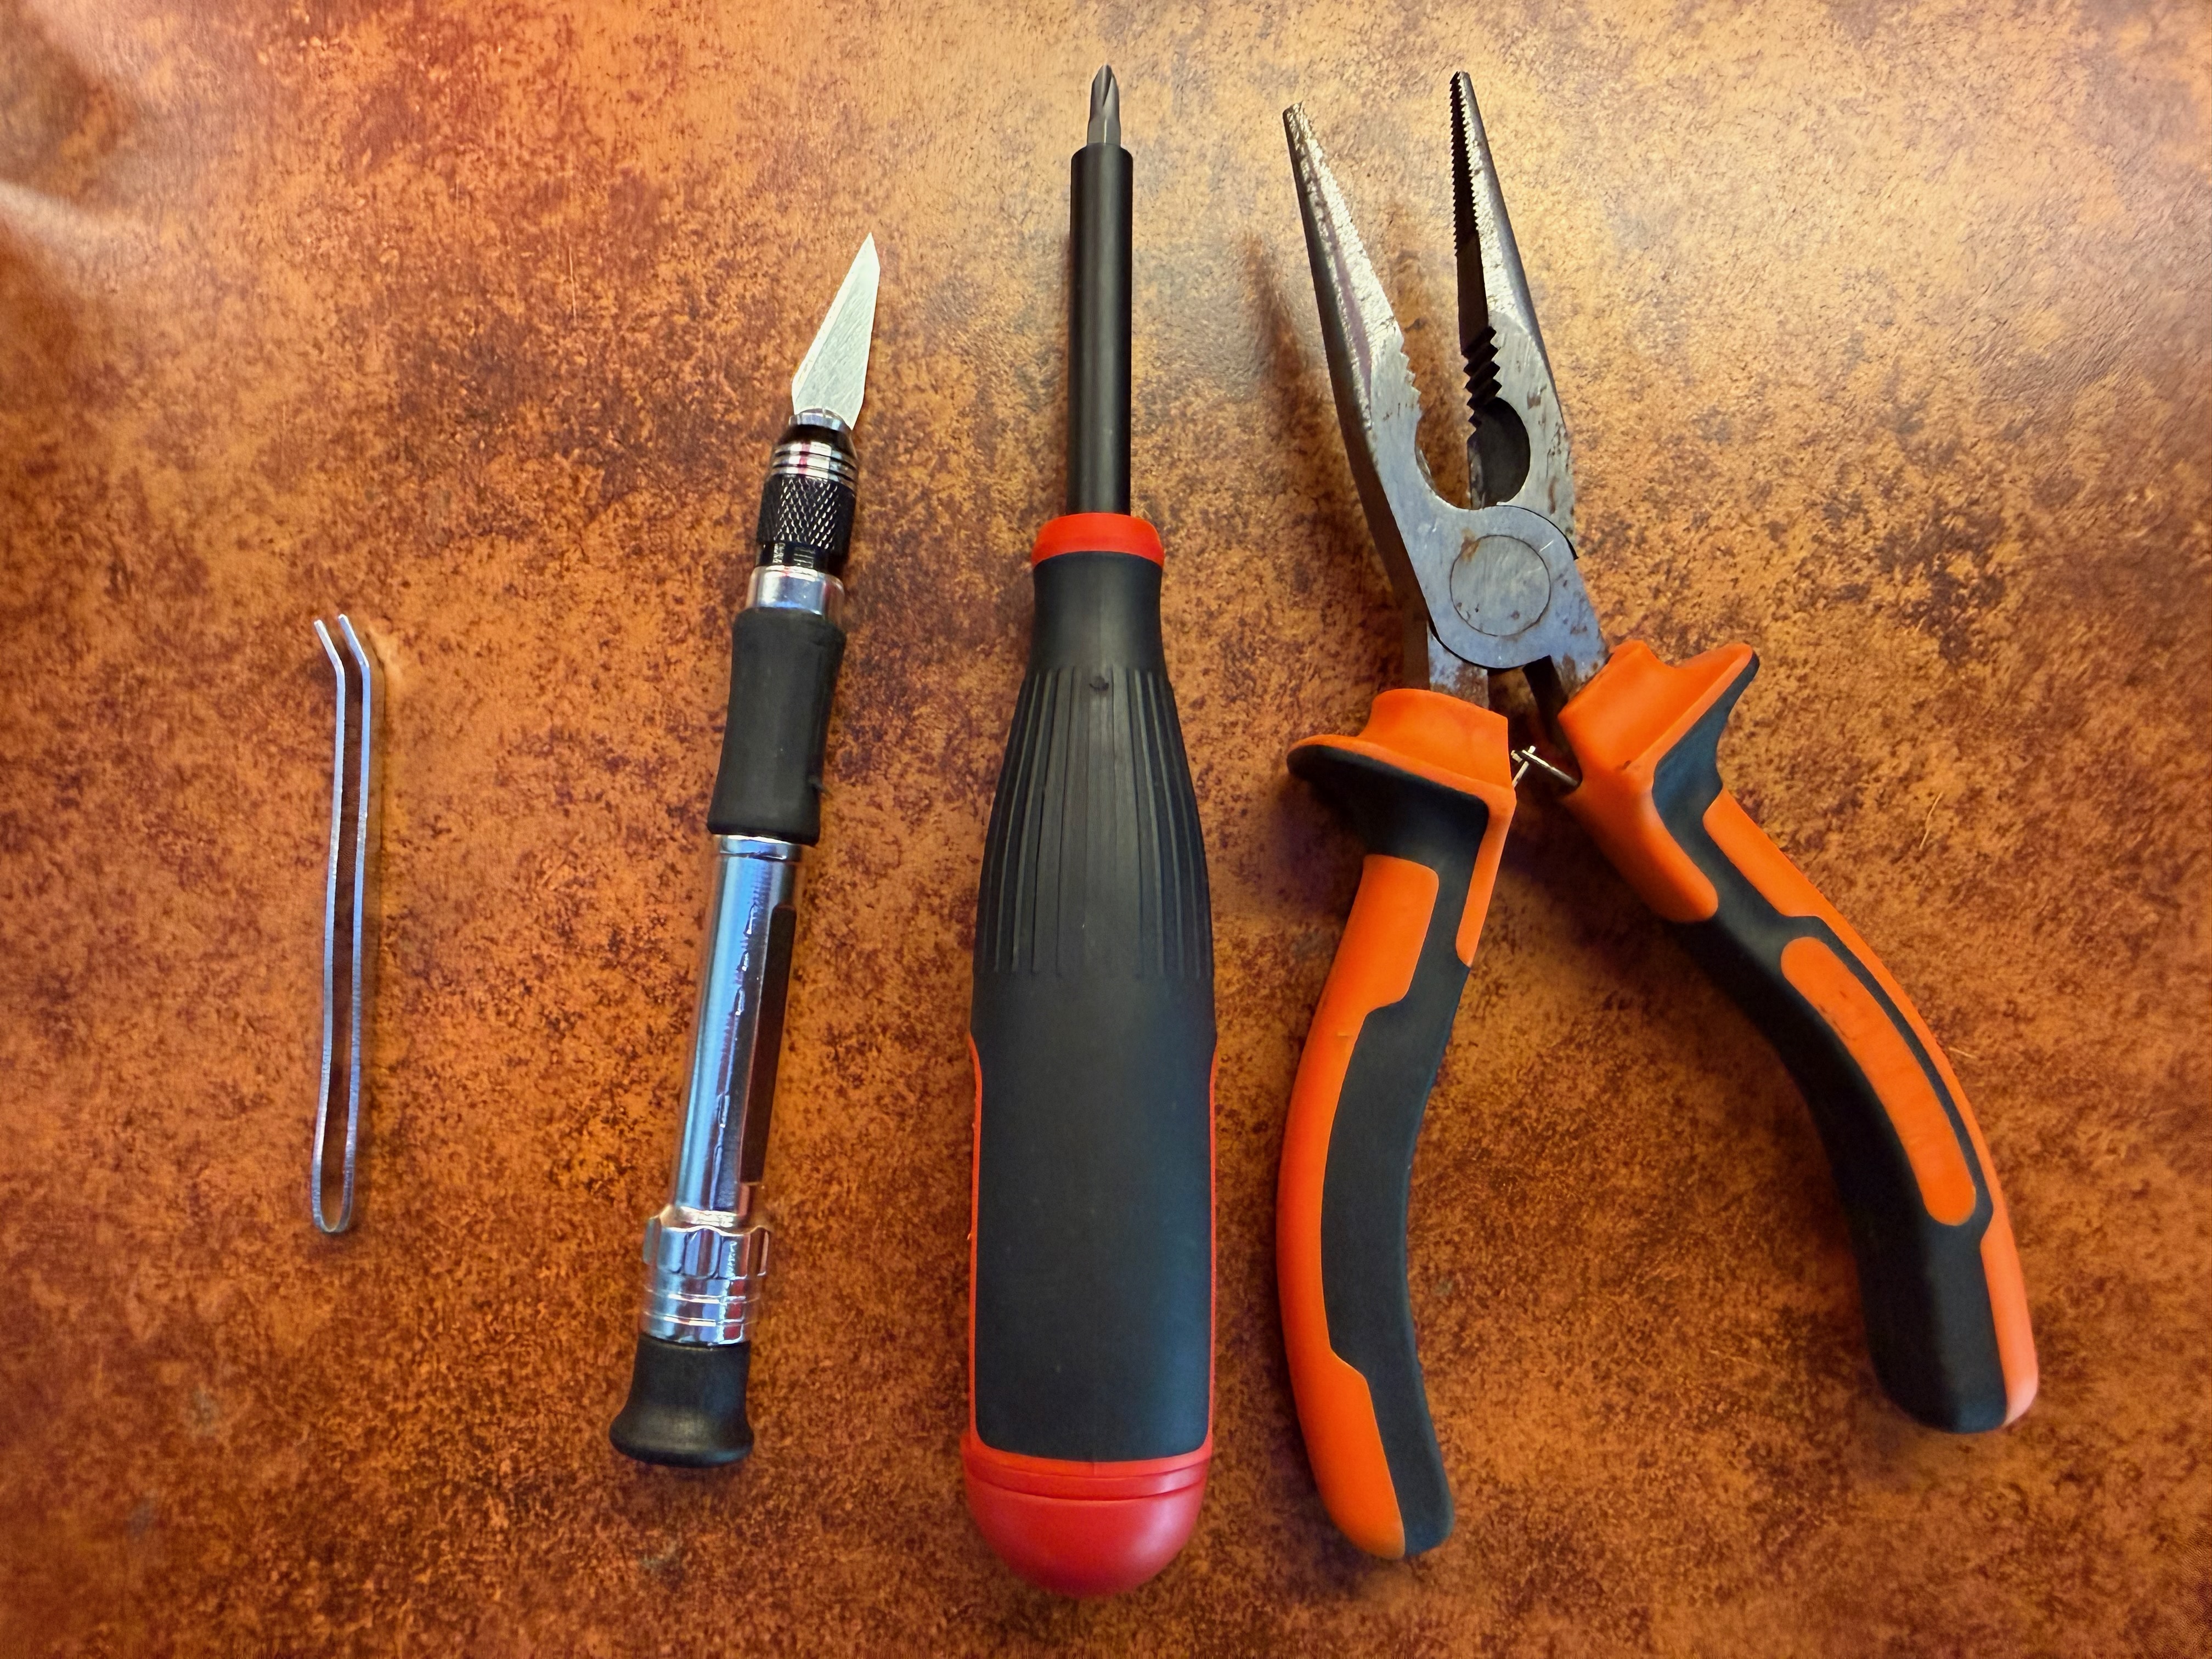
You don't need to use these exact tools but here are links to the ones I have. The hobby knife set is a bit of a steal at < $10, and the set came with the little tweezers pictured above, which were useful when putting the washers back on the machine screws:
The cover is held on with 6 small screws. Once the cover is off you can see the two small black fans at the back right:
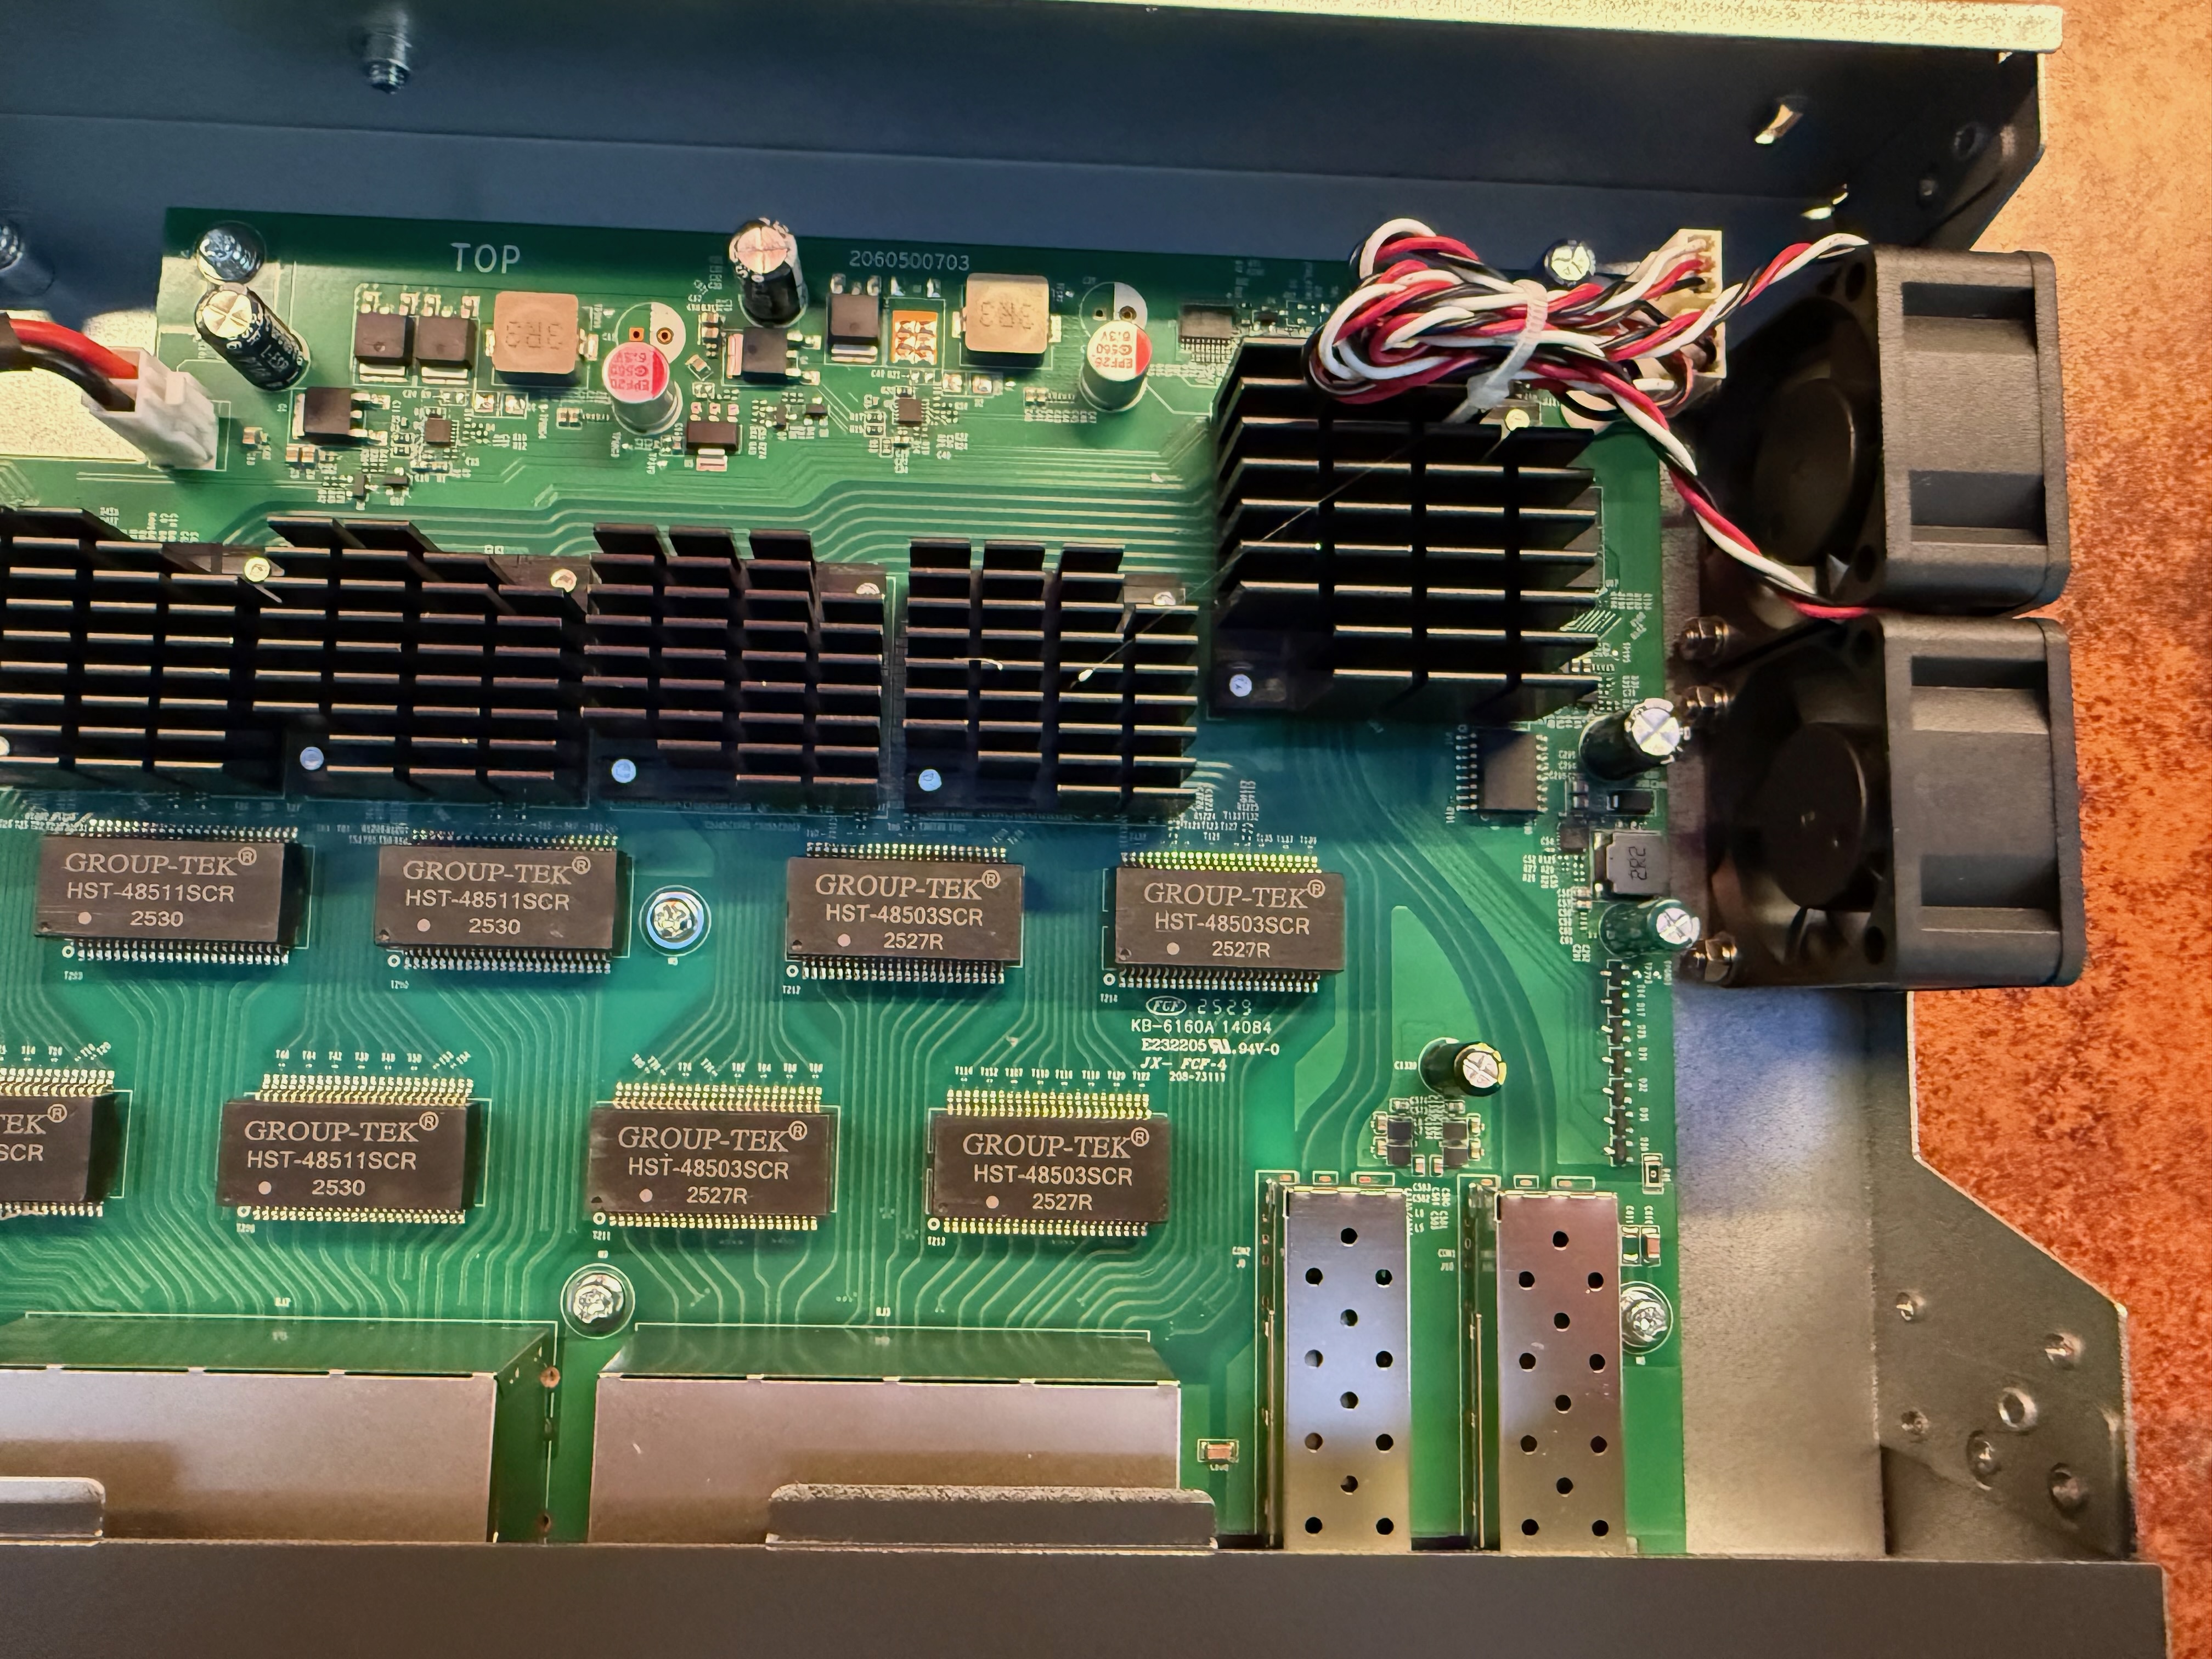
The fans are attached to the case with machine screws and nuts, with a couple of washers to keep things tight. There's not a huge amount of space in there to work with, but it's easy enough to grab either side of the nut with the pliers and use the screwdriver to unfasten the machine screw. Keep hold of the washer for the reinstall step:
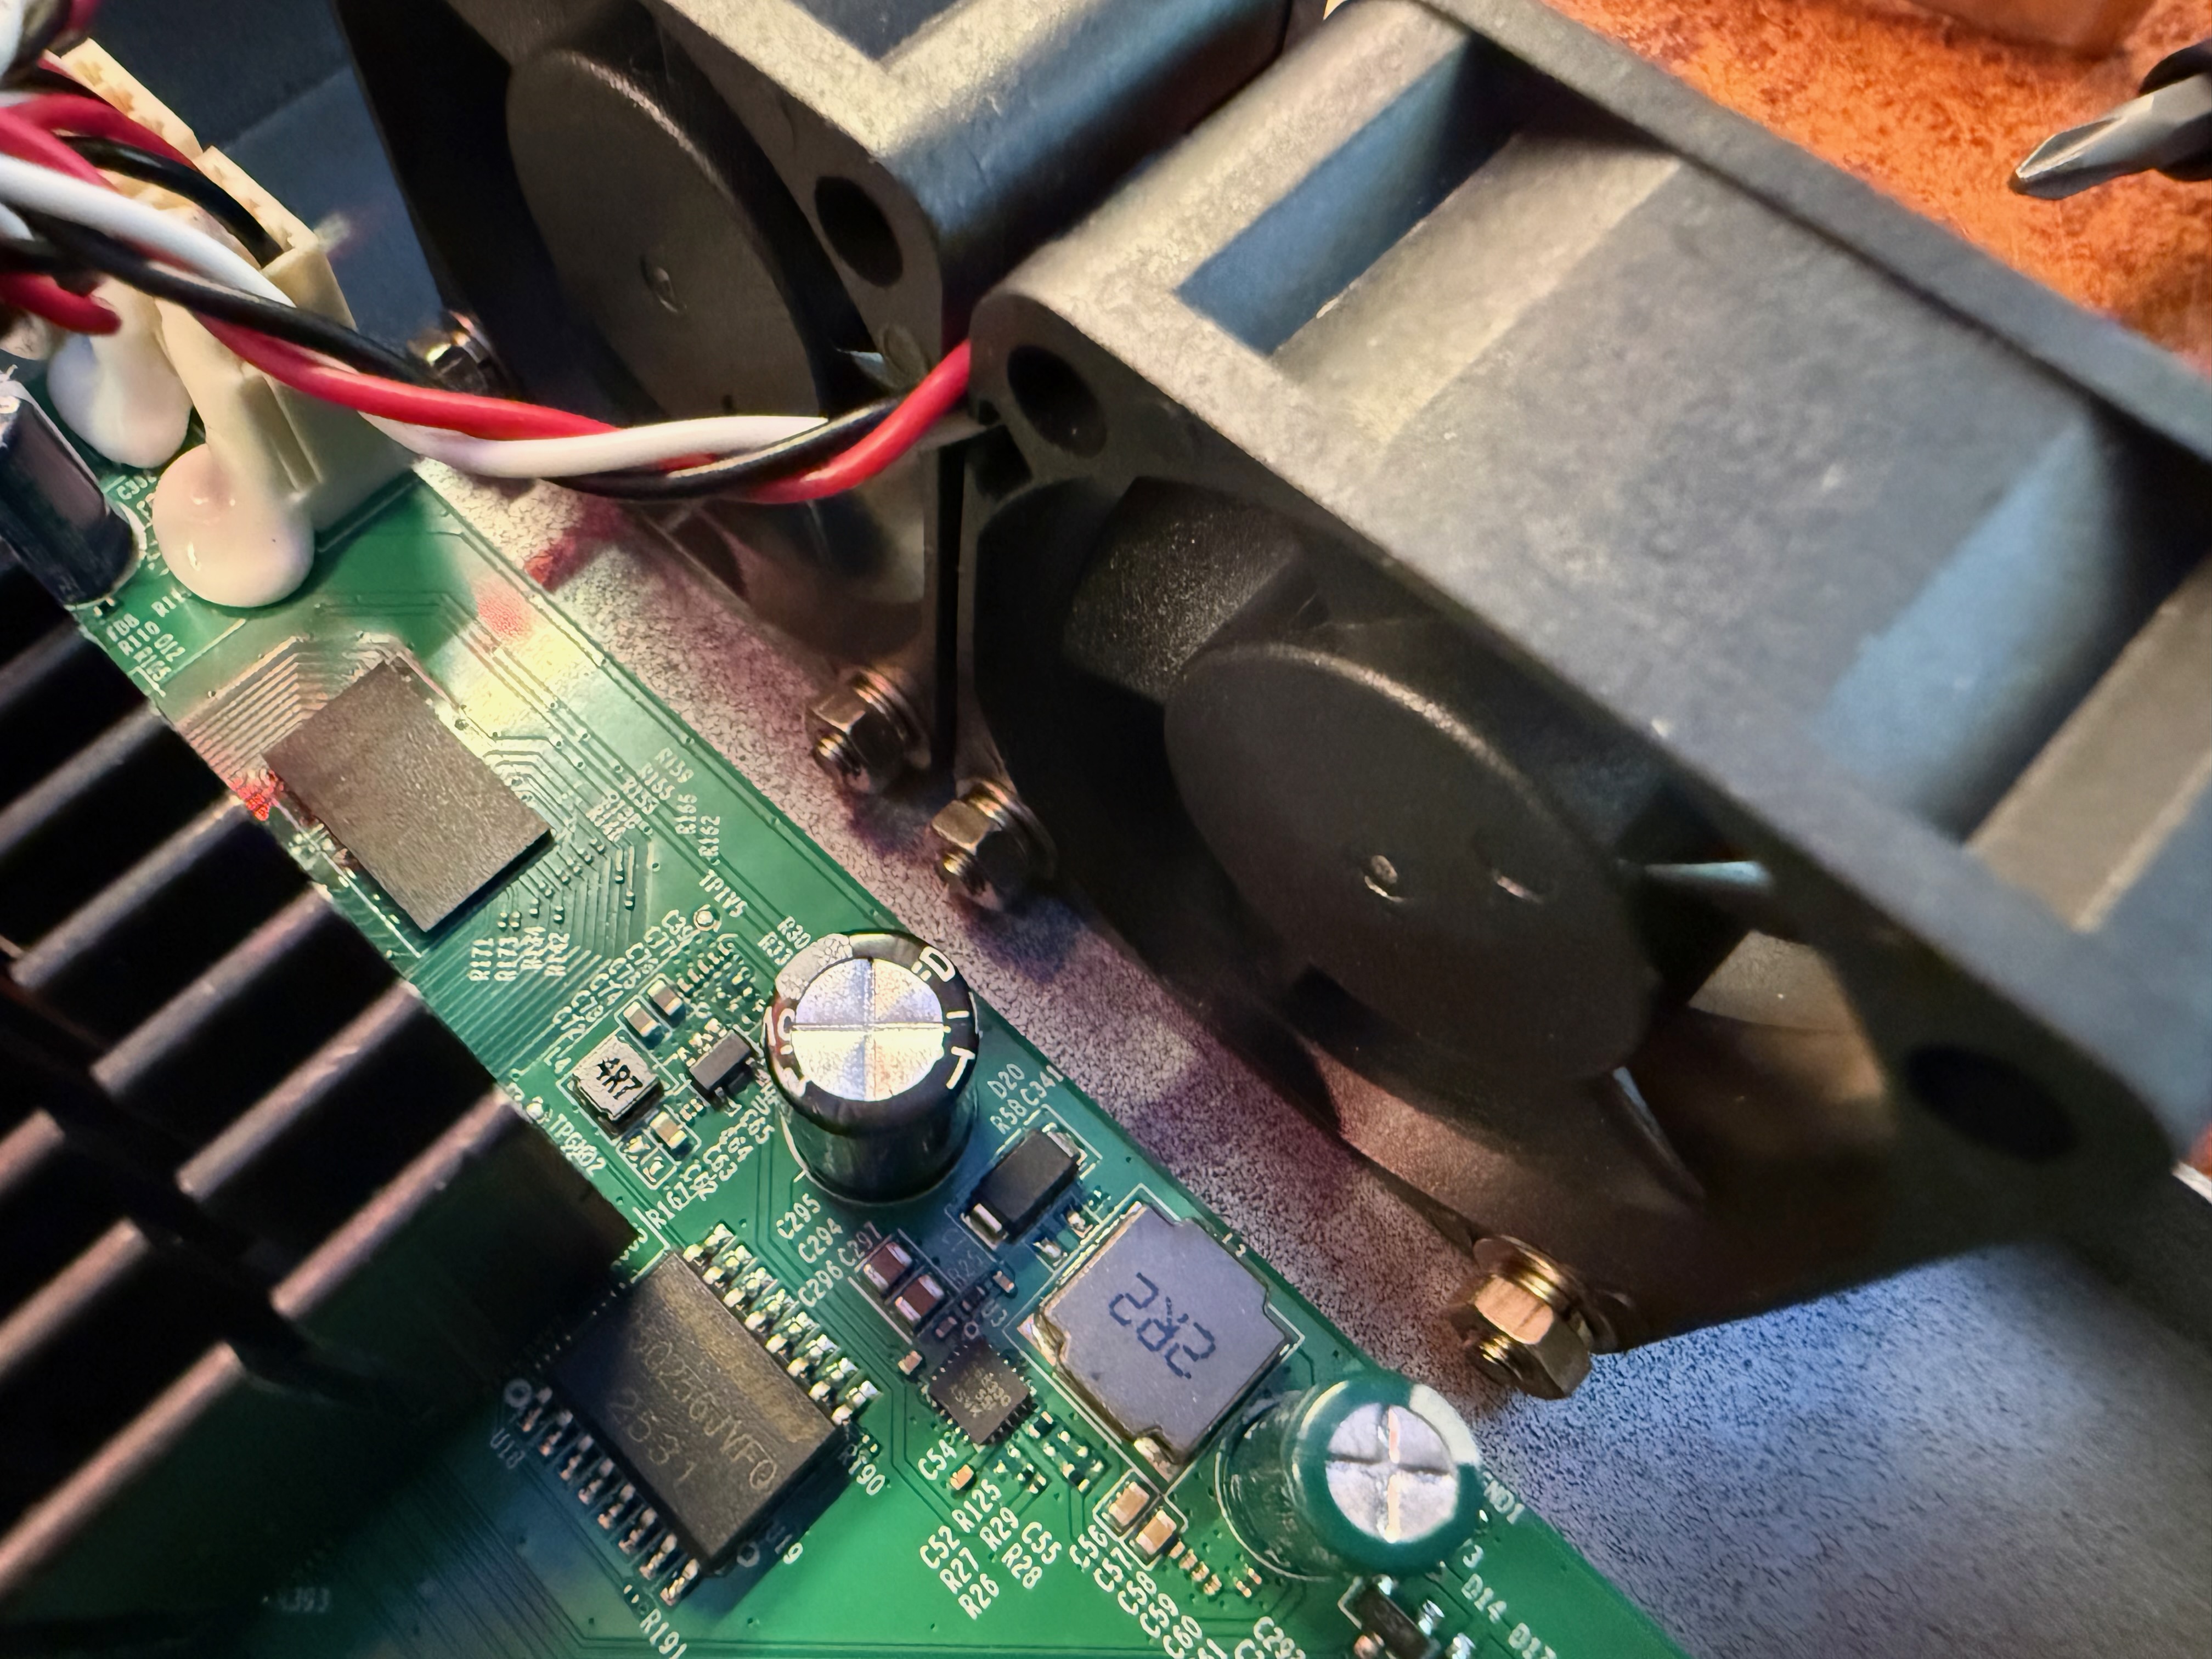
The fans are connected to normal 3-pin headers on the switch's main PCB, and are held in place with a little dab of glue that looks and feels like chewing gum:
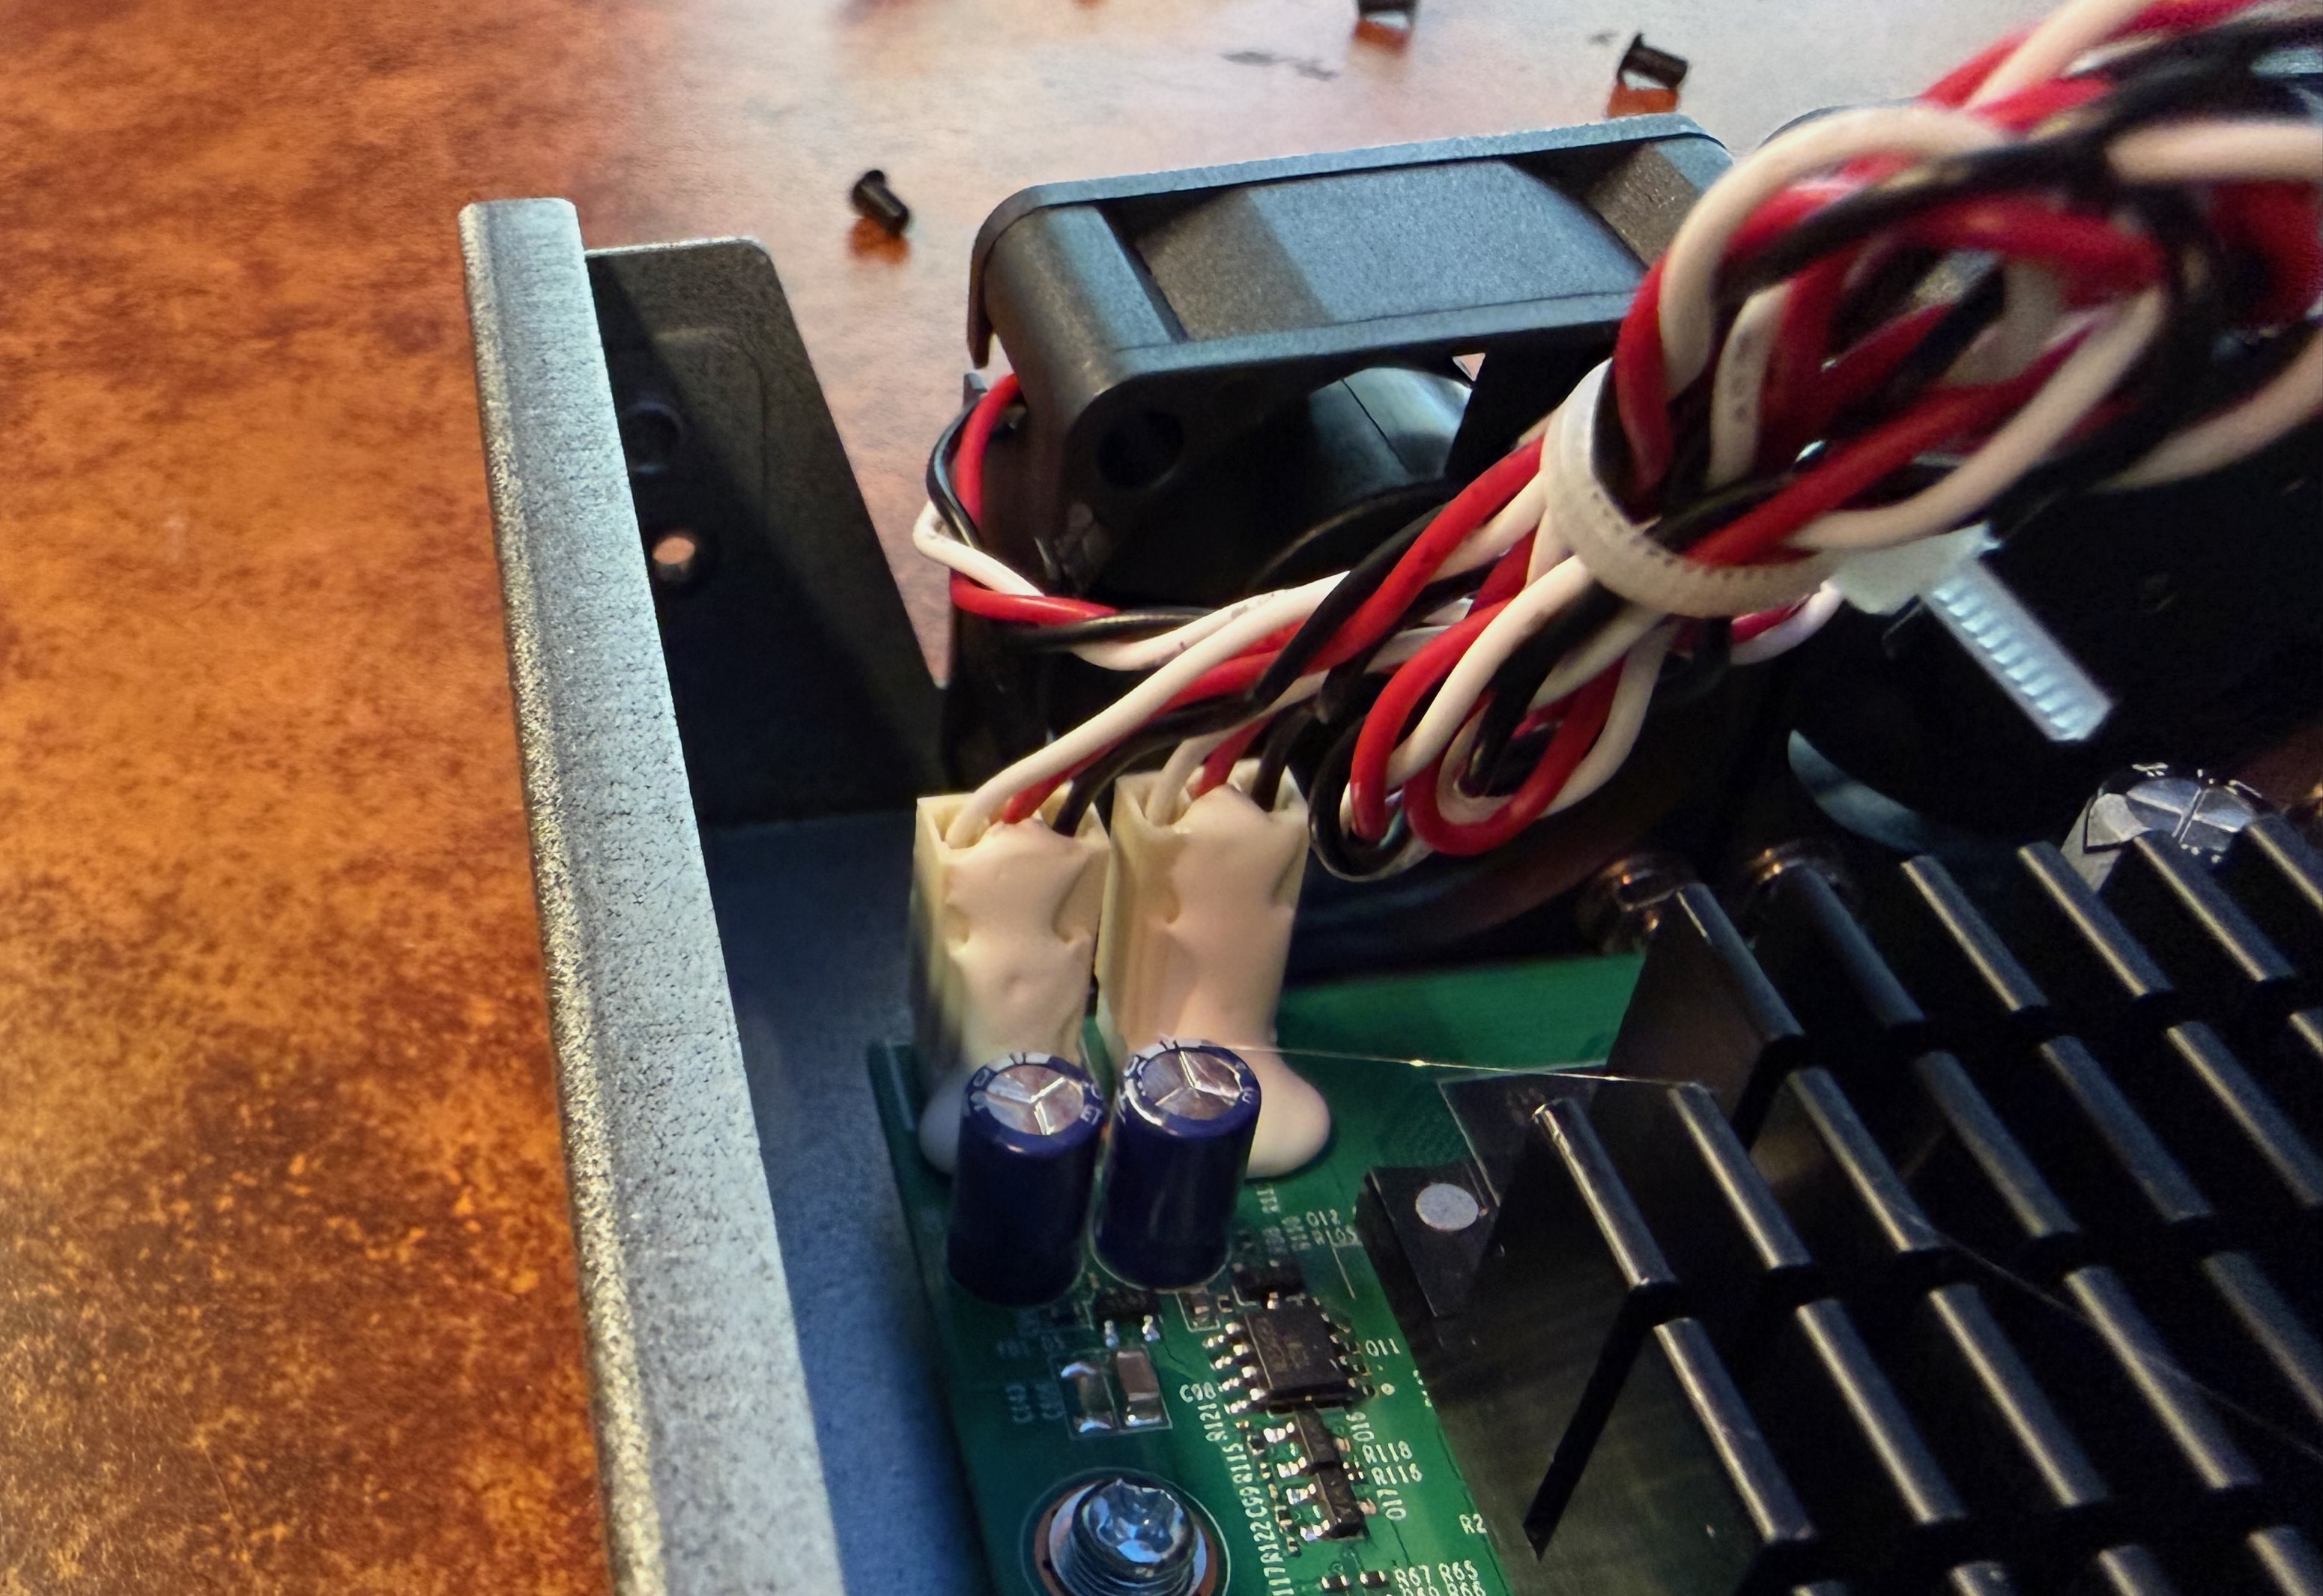
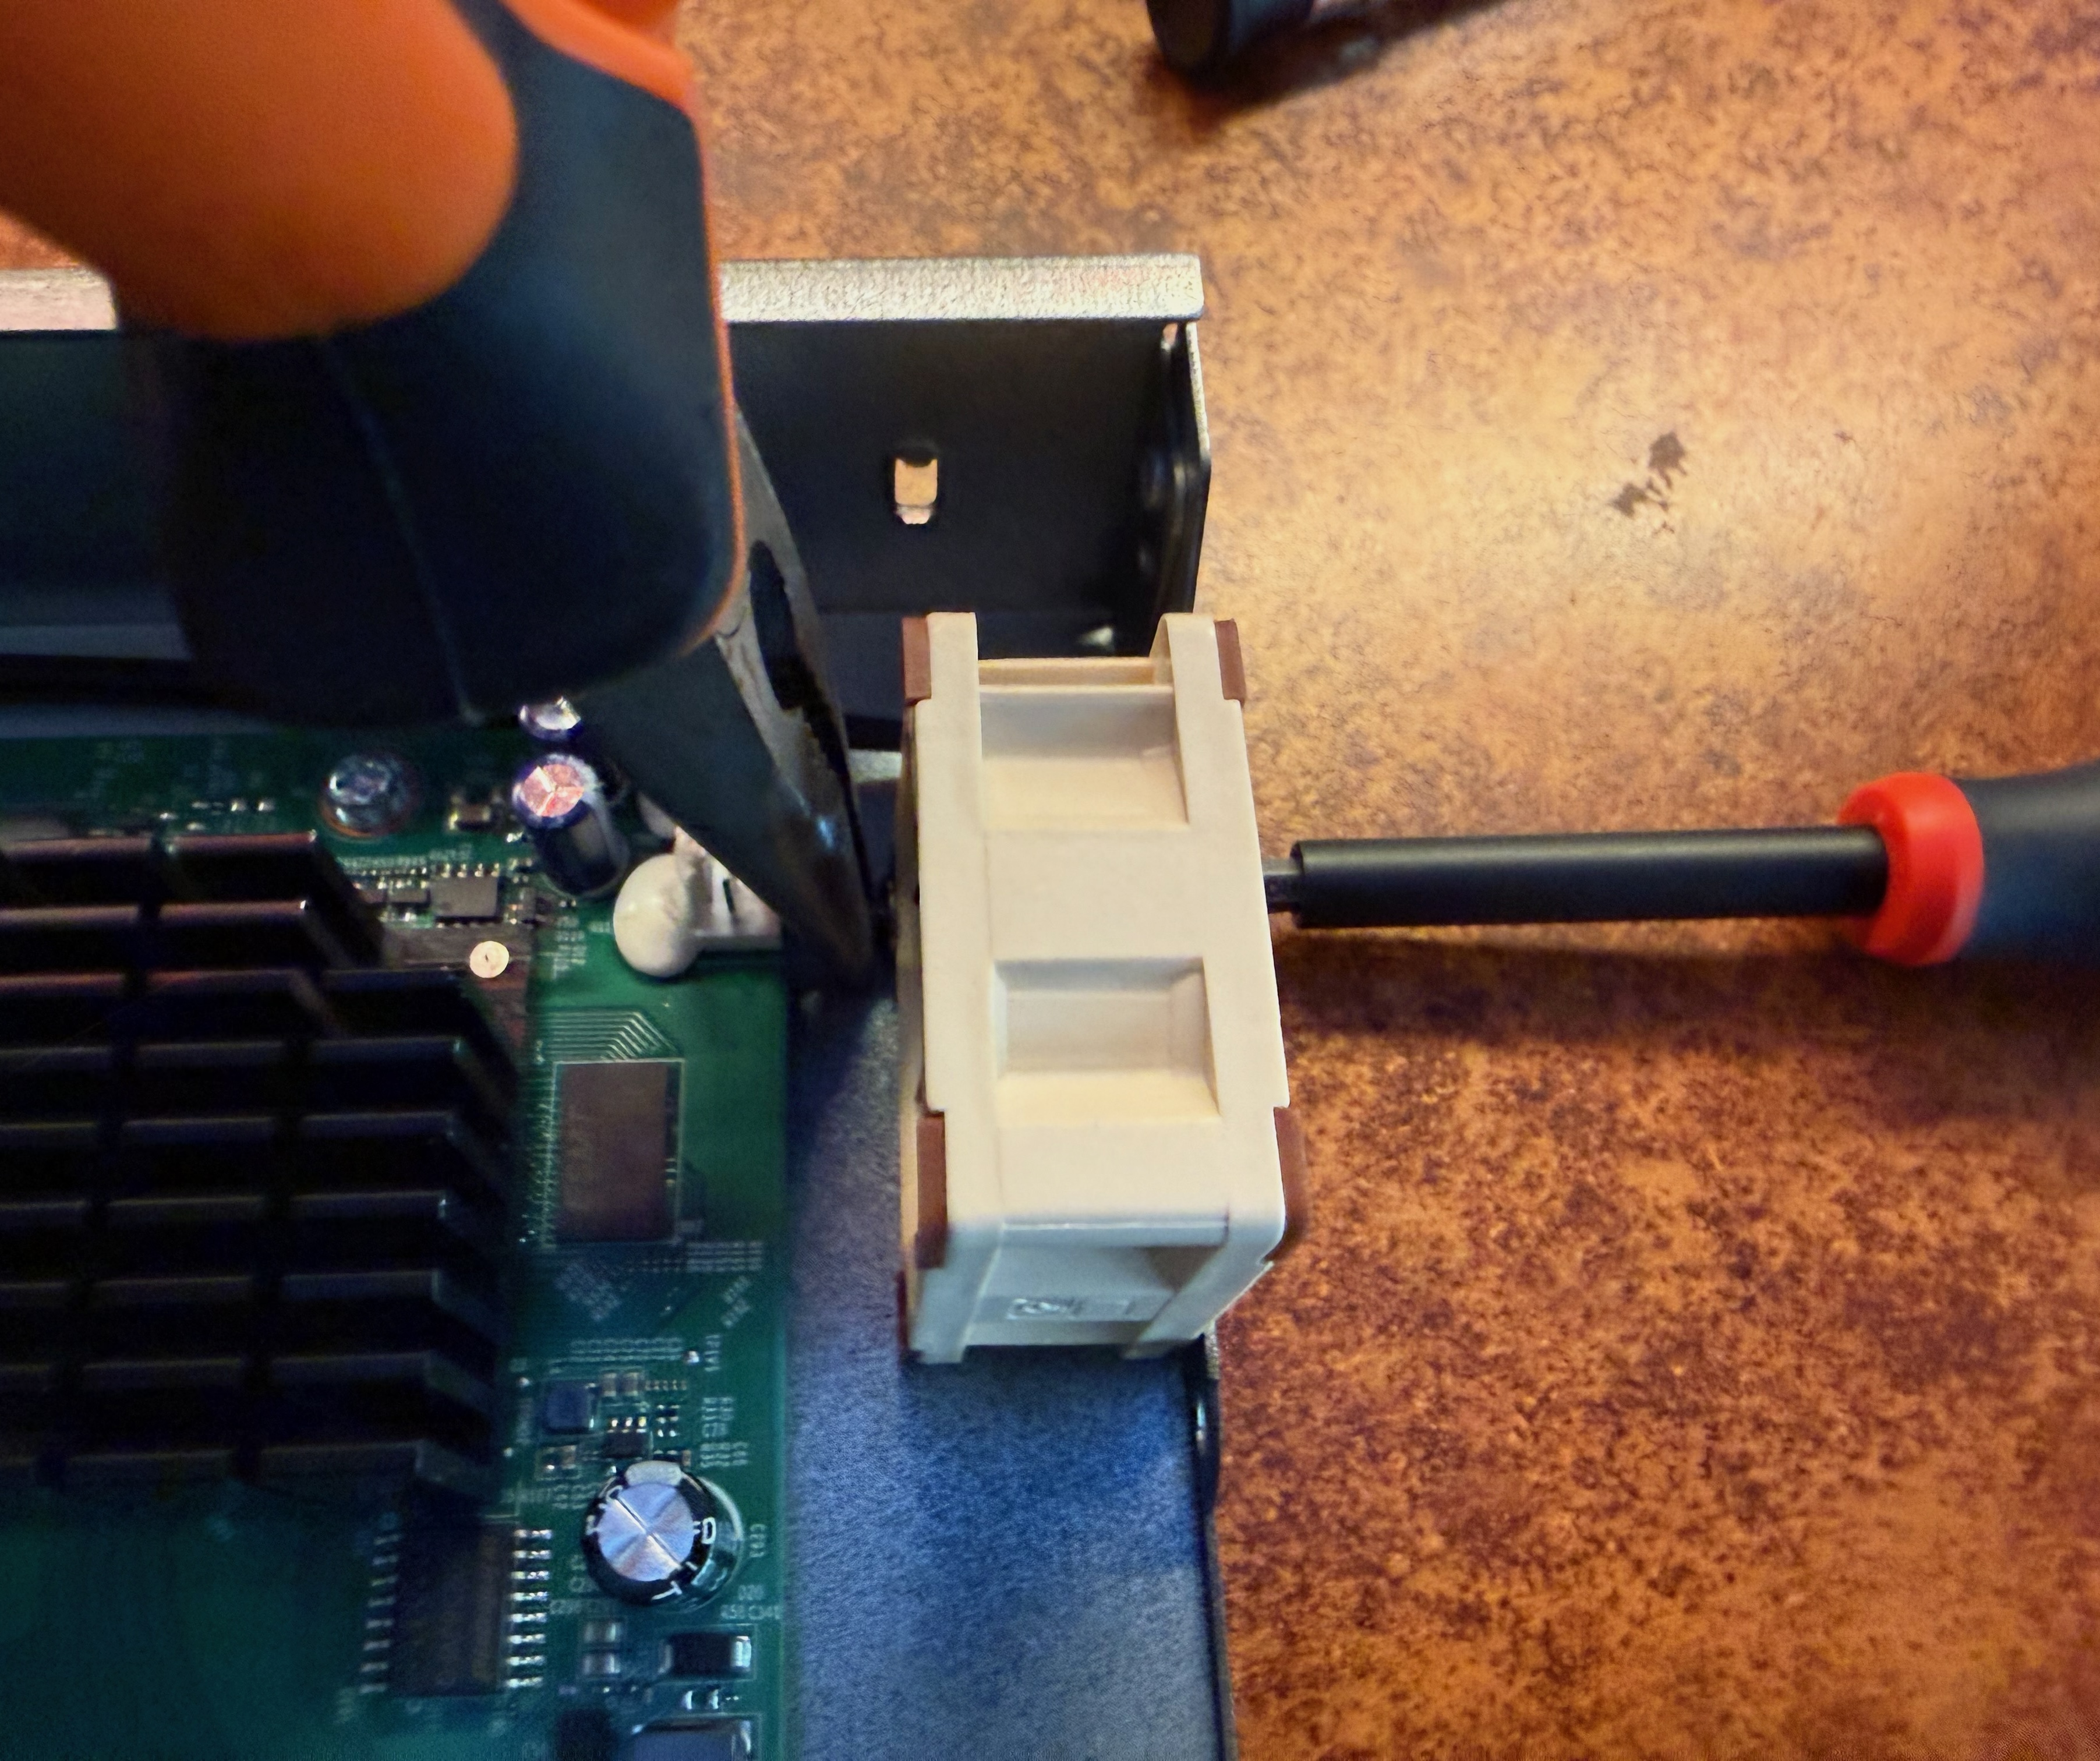
I carefully cut through this with the hobby knife, but there are many way to skin that cat. Once you've done that you can just lift the fans out of the case and throw them in the trash (well, only after you've confirmed the new ones work).
Installing the new fans is just doing the previous steps in reverse. I used the tweezers that came with the hobby knife set to carefully place the washers back over the machine screws (I held the screws in place with the screwdriver). Then I was able to grab the nut with the pliers, line it up with the screw, and screw it tight with the screwdriver:
Now just plug in the fan headers and we're good to go. Here's what it should look like before you put the cover back on:
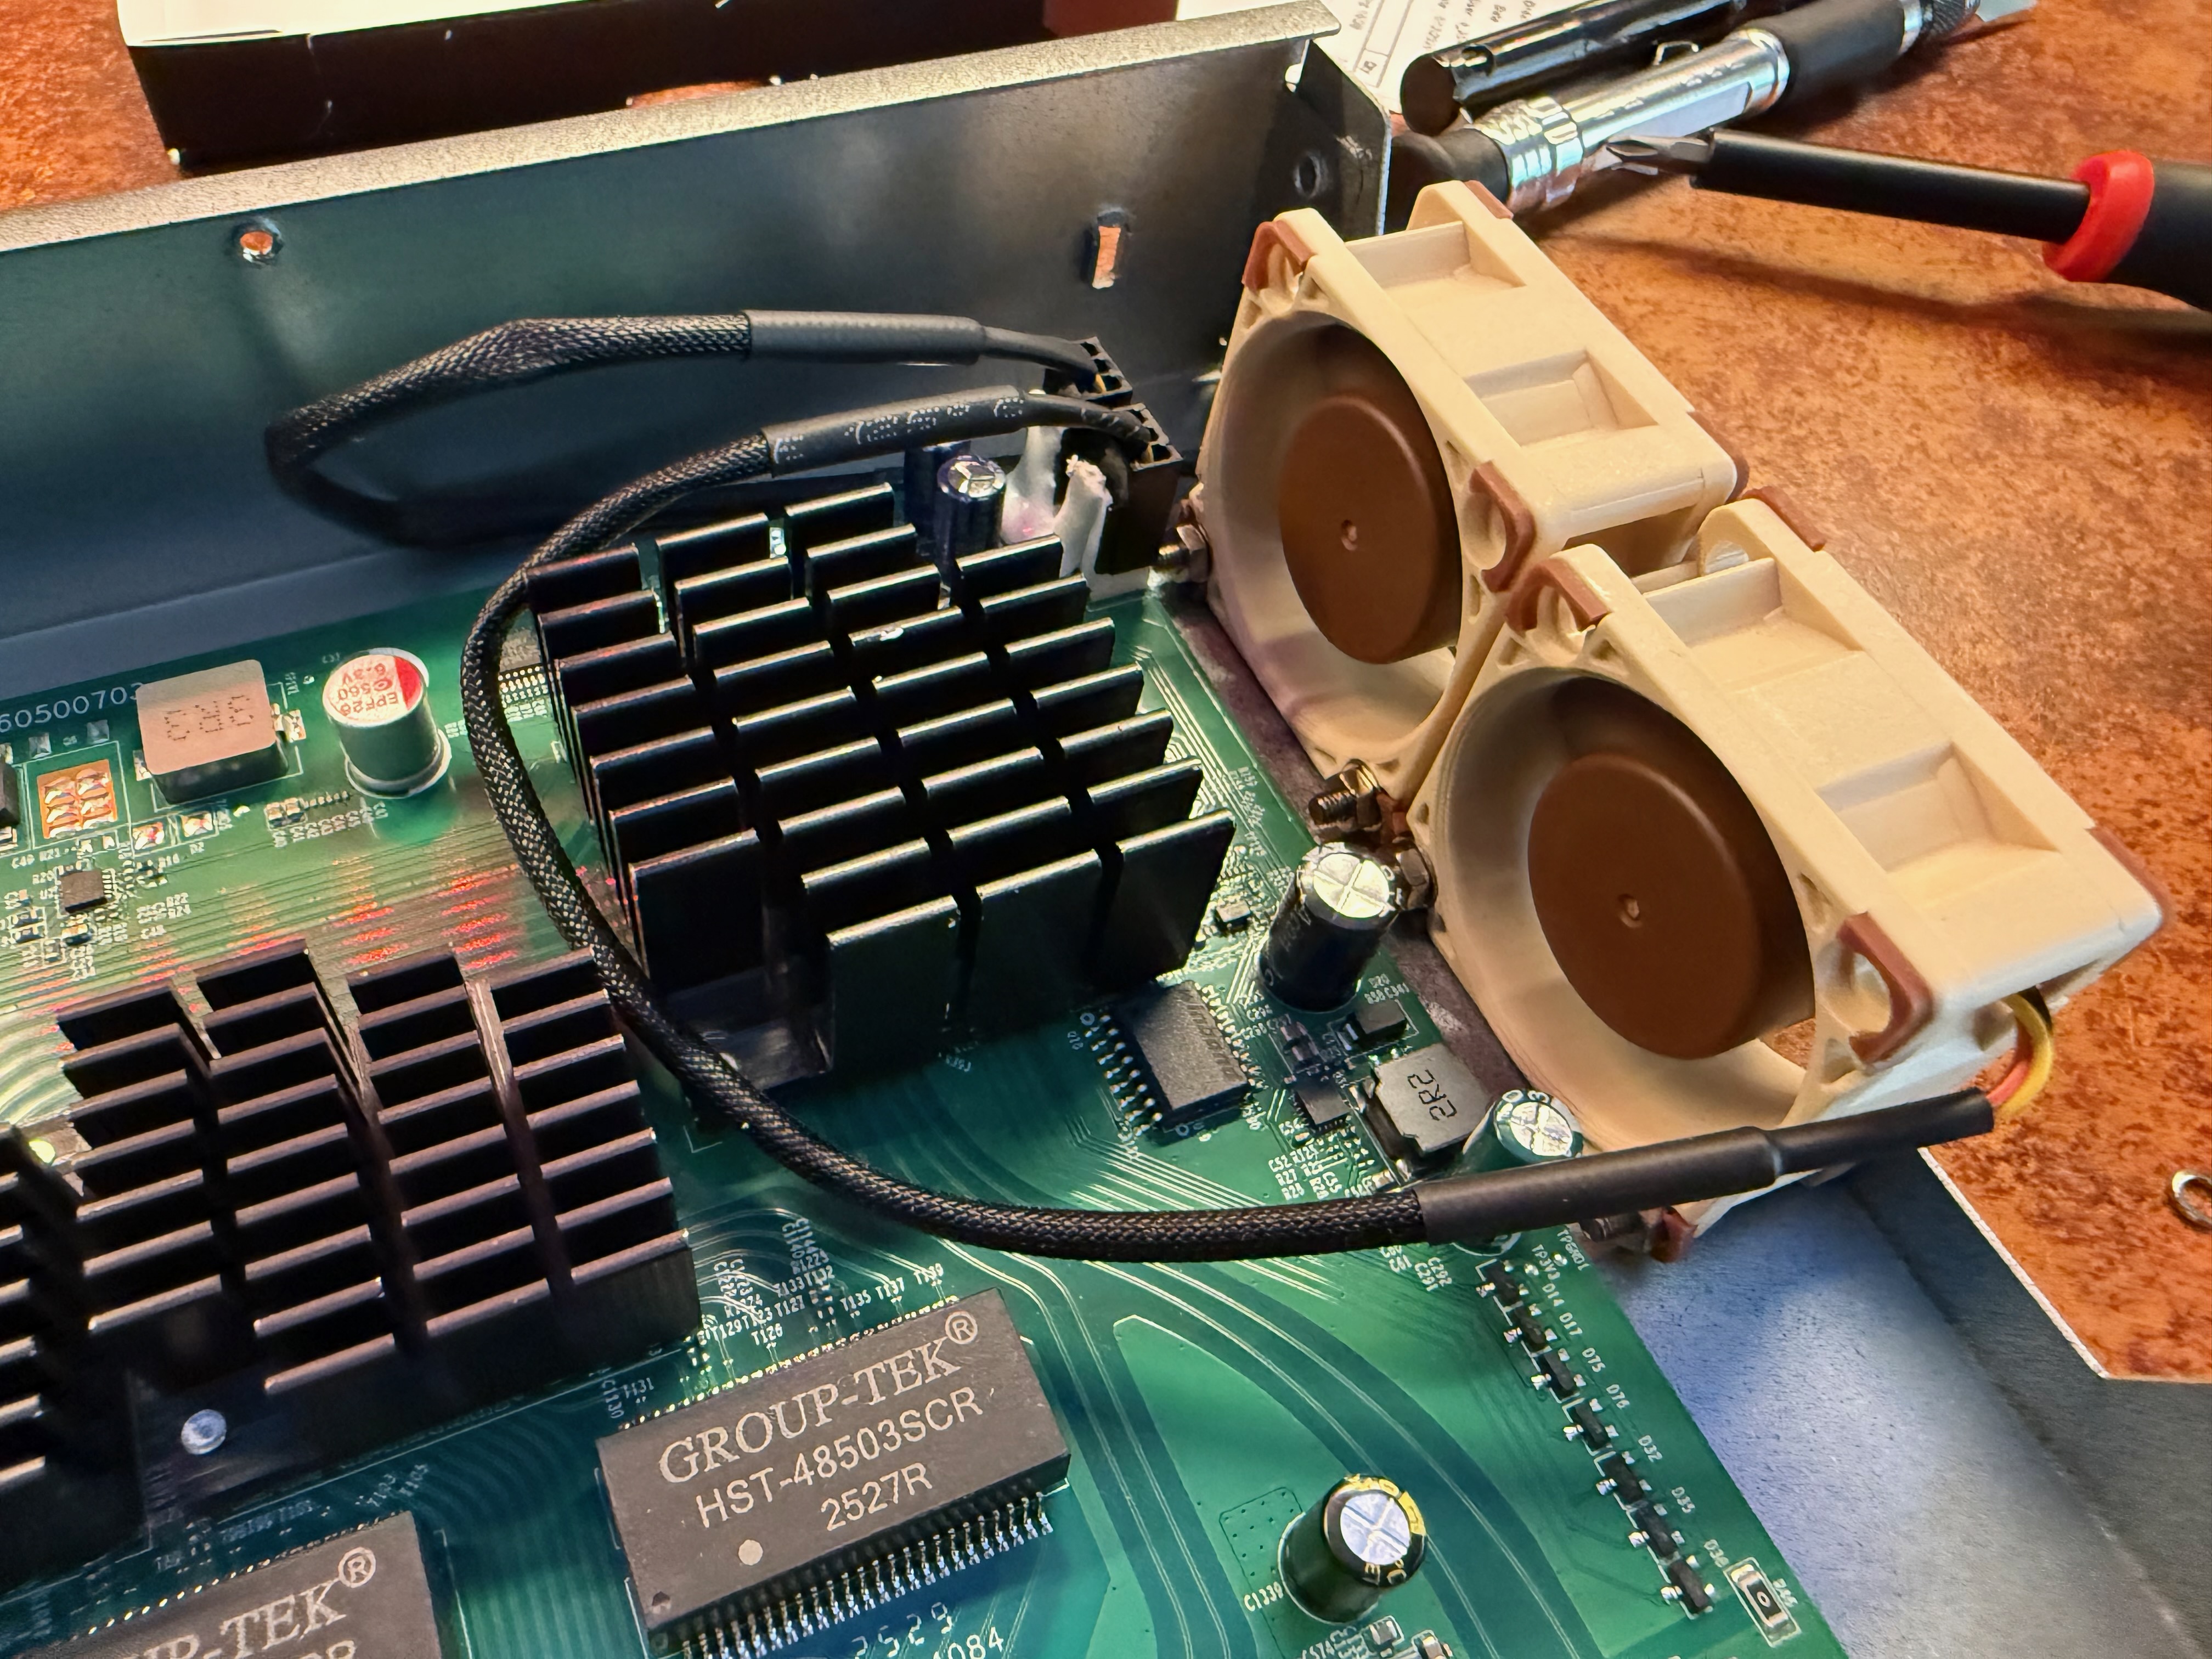
I didn't bother applying adhesive onto the header again, nor did I put the little lock washers back on - just the flat washer to avoid damaging the plastic fan housing.
Now, when I turn the switch on, instead of 50db for the first minute I get 40db. That's already as quiet as the old fans ever got - the new fan on full throttle is as loud as the old fans dialed down. After about a minute, the new fans throttle down to about 30db, which is a massive improvement and makes the switch not annoying to have next to me.
It's about a 15 minute process and anybody can do it. One minor niggle is that the new fan causes the FAN LED to turn orange on the front of the unit - I imagine the new fan uses less current than the old or something and the device is monitoring that.
I bought my devices directly from the Omada store. The SG3218XP-M2 has been discounted to $369 there (at the time of writing) for a couple of months now, and as I was a new customer I got a 10% discount beyond that too. Amazon has the same $369 price but not the 10% discount.
This is not a sponsored post. I'm not an expert with this stuff but making this modification has made a switch that I was 4/5 happy with into a 5/5 switch for my use case. Unfortunately the ~$35 dollars I saved with that 10% discount is precisely balanced out by the ~$35 I spent on the fans ($16 each).
It was 100% worth it though.
herdctl is an orchestration layer for Claude Code. It lets your agents run on a schedule, as part of a fleet, and puts them right in your discord or slack channel.
herdctl runs Claude Code agents securely in Docker, with schedules and chat
Learn moreAI-powered work documentation for career advancement
Start free demoherdctl runs Claude Code agents securely in docker, with optional schedules and chat
→ Read moremdx-prompt lets you write reusable and composable LLM prompts using JSX
→ Read morebragdoc.ai is an open source Next JS AI SaaS app for tracking your work
→ Read morereact-auto-intl automatically internationalizes and translates React and Next JS apps
→ Read moreNarratorAI creates AI-powered content like intros and search result summaries
→ Read moreInformAI allows AI to access and understand the information in your React components
→ Read moreReadNext creates AI-powered content recommendations for your blog or other content
→ Read moreI've built things on the web for 20 years, and used JavaScript before it was cool.
I've been working for myself since early 2023, going wherever my heart takes me - mostly playing with AI and UI.