Loading Fast and Slow: async React Server Components and Suspense
React Server Components promise a lightning-fast web. And they are, so long as you use them properly.
React and Next.js introduced Server Actions a while back, as a new/old way to call server-side code from the client. In this post, I'll explain what Server Actions are, how they work, and how you can use them in your Next.js applications. We'll look at why they are and are not APIs, why they can make your front end code cleaner, and why they can make your backend code messier.
In the beginning, there were <form>s. They had an action, and a method, and when you clicked the submit button, the browser would send a request to the server. The server would then process the request and send back a response, which could be a redirect. The action was the URL of the server endpoint, and the method was usually either GET or POST.
Then came AJAX, and suddenly we could send requests to the server without reloading the page. This was a game-changer, and it opened up a whole new world of possibilities for building web applications. But it also introduced a lot of complexity, as developers had to manage things like network requests, error handling, and loading states. We ended up building React components like this:
This code is fine, but it's a lot of boilerplate for something as simple as submitting a form. It's also not very readable, as the logic for handling the form submission is mixed in with the UI code. Wouldn't it be nice if we could go back to the good old days of <form>s, but without the page reload?
Now, with Server Actions, React is bringing back the simplicity of the old days, while still taking advantage of the power of modern web technologies. Server Actions allow you to call server-side code from the client, just like you would with a traditional form submission, but without the page reload. It wants you to think that this is all happening without an API on the backend, but this isn't true. It's not magic after all.
Here's how we can write the same form using Server Actions:
Here's that same AddDeviceForm Component running live in this page. It's a real React component, so try submitting it with and without text in the input field. In both cases it's hitting our createDeviceAction function, which is just a simple function that returns a success or error message based on the input:
One nice thing about this is that the Enter key works on your keyboard without any extra code. This is because the form is a real form, and the submit button is a real submit button. The formAction hook is doing the work of intercepting the form submission and calling the server action instead of the default form submission. It feels more like the old school web.
And here's the actual server action that is being called, in a file called app/actions/devices.ts:
The code here is simulating a database mutation and doing some basic validation. This all ought to look pretty familiar. Again, this is the actual copy/pasted code actually running behind the scenes.
We didn't set up any API routes, we didn't write any network request code, and we didn't have to handle any loading states or error handling. There is no code I am not showing you, stitching things together. We just wrote a simple form, and the Server Actions library took care of the rest. It's like magic!
But it's not magic. It's HTTP. If you open up your browser's developer tools and submit the form, you'll see a network request being made to the server, just like with a traditional form submission. The only difference is that the request is being intercepted by the Server Actions library and handled by the createDeviceAction function instead of the default form submission handler. This results in a POST request being sent to the current URL, with the form data and a bunch of other stuff being sent along with it.
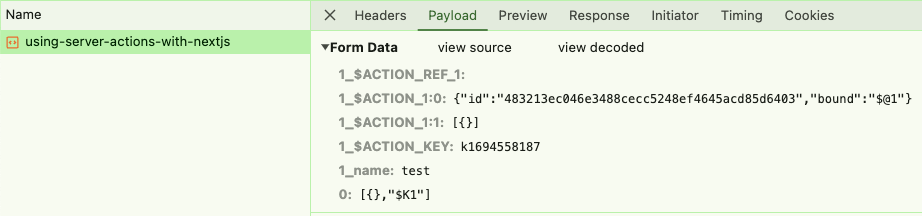
Here's what the response looked like:

Next.js has basically created an API endpoint for us, and then provided its own wrapper calls and data structures on both the request and response cycles, leaving us to focus solely on our UI and business logic.
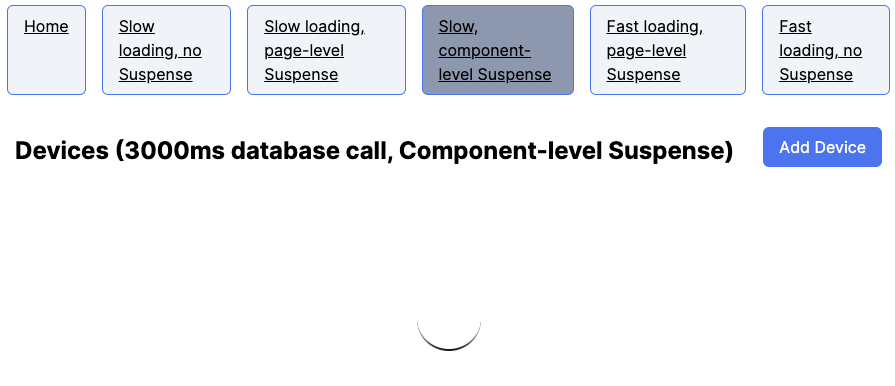
In many cases, the backend may take a few seconds to process the user's request. It's always a good idea to provide some visual feedback to the user while they are waiting. There's another lovely new React hook called useFormStatus that we can use to show a loading spinner while the request is pending. Here's a slightly modified version of the form that shows gives the user some feedback while the request is being processed:
This is almost identical to the first example, but I've split the submit button into a separate component and used the useFormStatus hook to show a loading spinner when the request is pending. It's also now pointing at the createDeviceActionSlow function, which is identical to the createDeviceAction function except it has a 3 second delay before returning the response.
Here's the live component - give it a whirl:
That's pretty cool. The useFormStatus hook is doing all the work of tracking the request status and updating the UI accordingly. It's a small thing, but it makes both the user experience and the developer experience a lot better.
It has been the case for quite some time that the greatest value in a web application is often not found in its UI but in its API. The UI is just a way to interact with the API, and the API is where the real work gets done. If your application is genuinely useful to other people, there's a good chance they will want to integrate with it via an API.
There is a school of thought that says your UI should be treated just the same as any other API client for your system. This is a good school, and its teachers are worth listening to. UIs are for humans and APIs are for machines, but there's a lot of overlap in what they want in life:
Can't we service them both with the same code? Yes, we can. But it's not always as simple as it seems.
Way up in that second example snippet, we were making a POST request to /api/devices; our UI code was talking to the exact same API endpoint that any other API user would be talking to. There are many obvious benefits to this, mostly centering around the fact that you don't need to maintain parallel code paths for UI and API users. I've worked on systems that did that, and it can end up doubling your codebase.
Server Actions are great, but they take us away from HTTP and REST, which are bedrock technologies for APIs. It's very easy to spam together a bunch of Server Actions for your UI, and then find yourself in a mess when you need to build an API for someone else to use.
The reality is that although API users and UI users do have a lot in common, they also have differences. In our Server Action examples above we were returning a simple object with a status and a message, but in a real API you would likely want to return a more structured response, with an HTTP status code, headers, and a body. We're also much more likely to need things like rate limiting for our API users, which we didn't have to think about for our UI users.
Consider a super simple POST endpoint in a real API. Assume you're using Prisma and Zod for validation - a fairly common pairing. Here's how you might write that API endpoint:
This API endpoint consumes JSON input (assume that auth is handled via middleware), validates it with Zod, and then creates a new device in the database. If the input is invalid, it returns a 400 status code with an error message. If the input looks good but there's an error creating the device, it returns a 500 status code with an error message. If everything goes well, it returns a 201 status code with the newly created device.
Now let's see how we might write a Server Action for the same functionality:
The core of these 2 functions is the same exact 2 lines - one to validate using zod, the other to persist using Prisma. The flow is exactly the same, but in one case we're grabbing JSON, in the other reading form data. In one case we're returning NextResponse objects with HTTP status codes, in the other we're returning objects with success and message keys. The Server Action can also take advantage of nice things like revalidatePath to trigger a revalidation of the page that called it, but we don't want that line in our API endpoint.
Somewhere along the line we will want to show a message to the UI user telling them what happened - hence the message key in the Server Action (the API user can just read the HTTP status code). We could have moved that logic to the UI instead, perhaps returning a statusCode key in the JSON response to emulate an HTTP status code. But that's just reimplementing part of HTTP, and moving the problem to the client, which now has to provide the mapping from a status code to a message. It also means a bigger bundle if we want to support internationalization for those messages.
What this all means is that if you want to take advantage of the UI code cleanliness benefits that come from using Server Actions, and your application conceivably might need an API now or in the future, you need to think about how you are going to avoid duplicating logic between your Server Actions and your API endpoints. This may be a hard problem, and there's no one-size-fits-all solution. Yes you can pull those 2 lines of core logic out into a shared function, but you're still left with a lot of other almost-the-same-but-not-quite code.
Ultimately, it probably just requires another layer of indirection. What that layer looks like will depend on your application, but it's something to think about before you go all-in on Server Actions.
Consider reading Loading Fast and Slow: async React Server Components and Suspense to learn more about optimizing performance using server-side rendering in React applications. Additionally, Promises across the void: Streaming data with RSC delves into innovative ways to handle asynchronous data with React Server Components.
React Server Components promise a lightning-fast web. And they are, so long as you use them properly.
React Server Components let you send unresolved promises from server to client.

More than you ever need to know about how React Server Component Payloads work.
A lot has changed in the last few years when it comes to implementing applications using JavaScript.
herdctl runs Claude Code agents securely in Docker, with schedules and chat
Learn morePerformance review optimization for software professionals
Try BragDoc freeherdctl runs Claude Code agents securely in docker, with optional schedules and chat
→ Read moremdx-prompt lets you write reusable and composable LLM prompts using JSX
→ Read morebragdoc.ai is an open source Next JS AI SaaS app for tracking your work
→ Read morereact-auto-intl automatically internationalizes and translates React and Next JS apps
→ Read moreNarratorAI creates AI-powered content like intros and search result summaries
→ Read moreInformAI allows AI to access and understand the information in your React components
→ Read moreReadNext creates AI-powered content recommendations for your blog or other content
→ Read moreI've built things on the web for 20 years, and used JavaScript before it was cool.
I've been working for myself since early 2023, going wherever my heart takes me - mostly playing with AI and UI.